Celebrate Halloween with these DIY Halloween polymer clay magnets. An easy craft that requires zero skills making it ideal for beginners. I made these with my nephew and neice and they had so much fun, these are there designs and i think they turned out great. These little magnets take around 15 – 30 minutes to make depending on the design. These spooky magnets also are very cheap to make, as a little polymer clay goes a long way.
This post contains affiliate links. I earn a small commission from purchases at no extra cost to you.
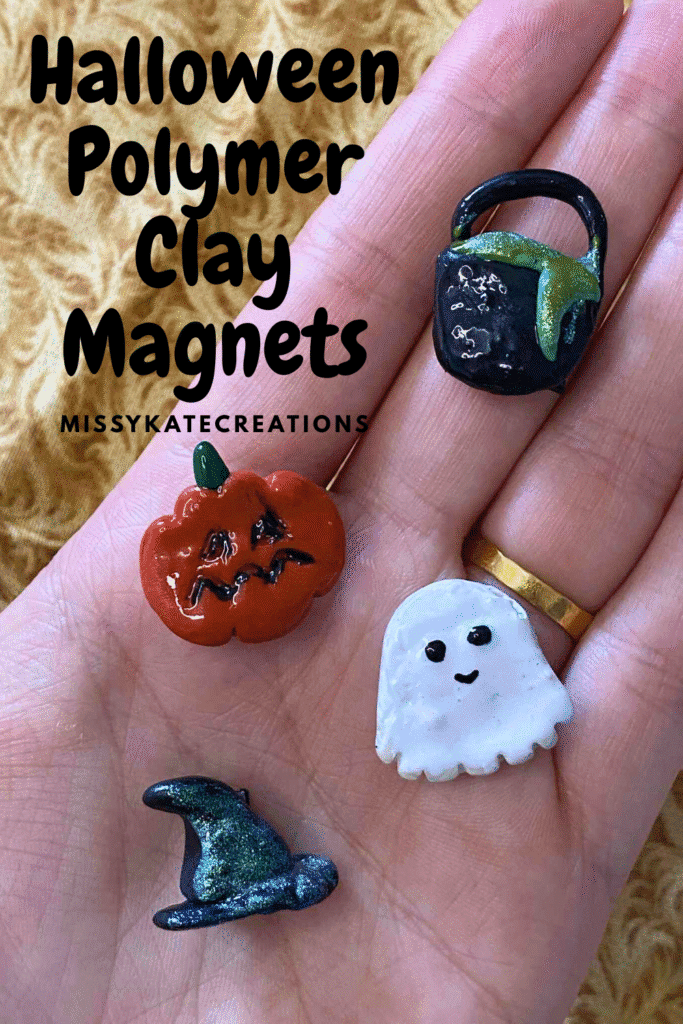
DIY Halloween Polymer Clay Magnets
Halloween is just around the corner, and if you’re looking for a fun, budget-friendly craft project that’s perfect for all skill levels, these DIY Halloween polymer clay magnets are exactly what you need! These magnets are a great craft to do with kids, they make neat party favors, and are cute dainty charms to your own home. They are fairly easy to make, so lets get started!
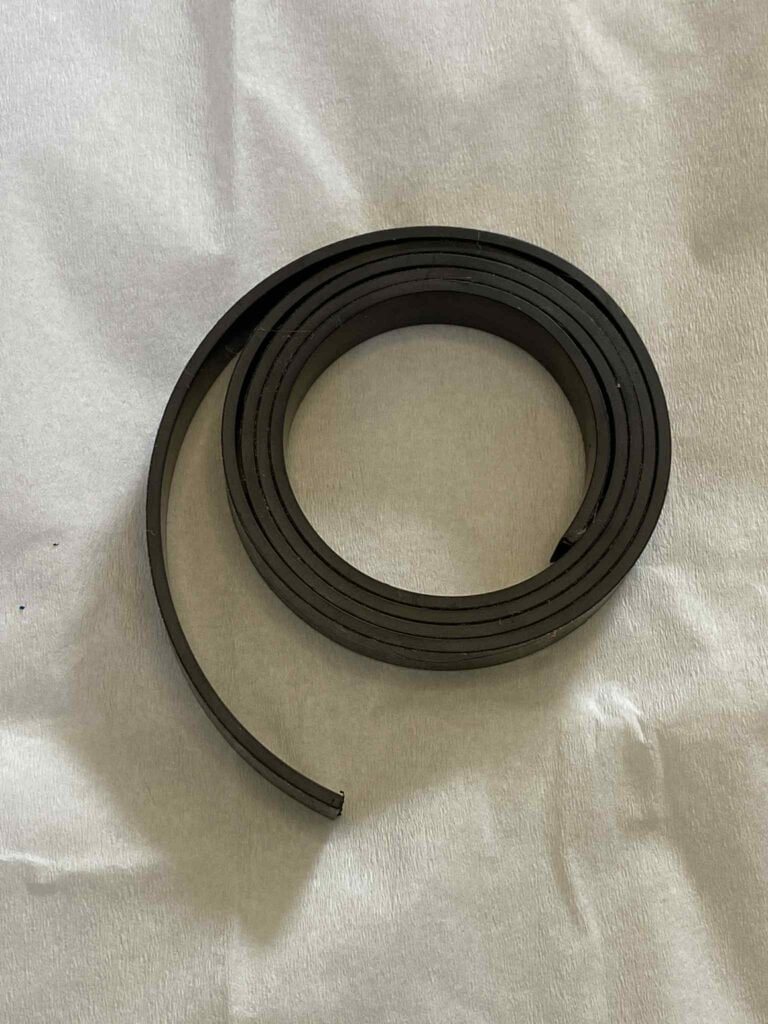
If i am being honest with you, I only started making polymer clay magnets this year, and let me tell you i have fallen in love with the craft. All you need is magnetic tape, strips or rounds, an air fryer or oven, polymer clay and super glue. Basic supplies but amazing creations.
What You’ll Learn in This Tutorial on DIY Halloween Polymer Clay Magnets
- 10 different Halloween magnet designs from beginner to intermediate
- Complete supply list with budget-friendly alternatives
- Step-by-step instructions with troubleshooting tips
- How to properly bake and finish your magnets
Why Polymer Clay is Perfect for Halloween Magnets
Polymer clay is my go-to material for small seasonal projects because it’s:
- Beginner-friendly: Mistakes are easily fixed before baking
- Affordable: One pack of clay makes a heck of a lot of magnets
- Durable: Won’t break like ceramic and lasts for years
- Customizable: Mix colors to create perfect Halloween shades
- Quick: Each magnet bakes in just 15-30 minutes or 3-5 in the air-fryer
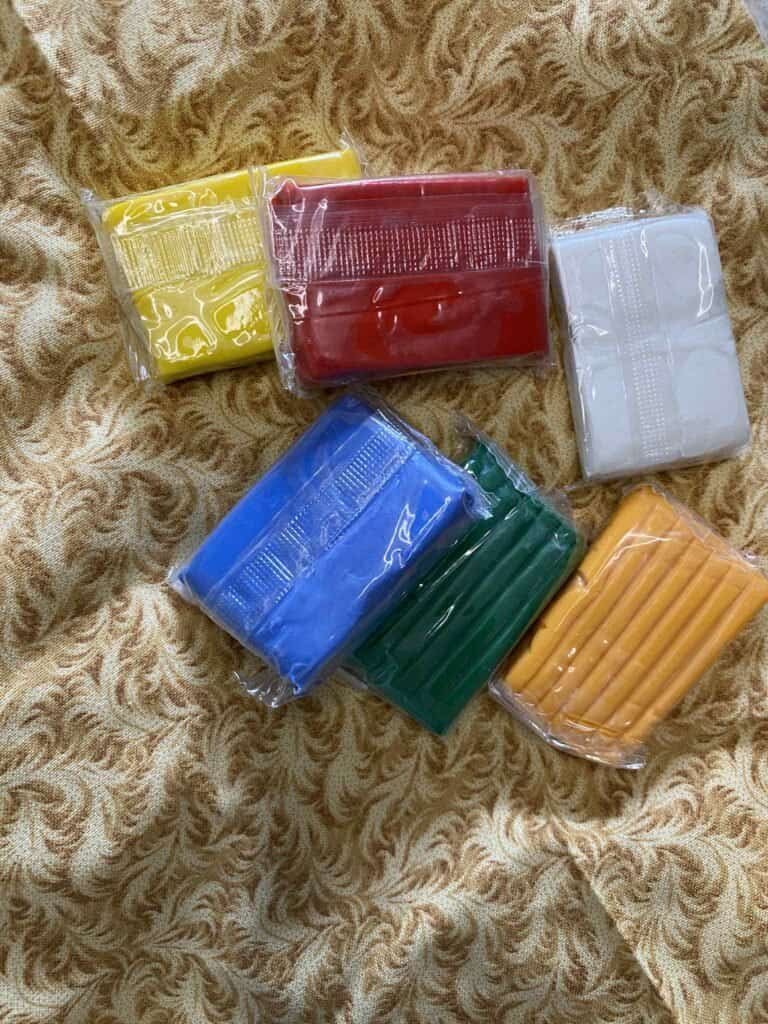
Complete Supply List
Essential Materials
- Polymer clay in Halloween colors
- Magnets(I used a strong magnetic tape/strips as this can be cut to size, but magnetic rounds work too.
- Super glue (any brand should do )
- Acrylic paint or Nail Polish (I used gel and a UV lamp)
- Clear Coat Nail Polish to seal everything ( I used a gel Clear Top Coat)
Helpful Tools
- Rolling pin or acrylic roller (a glass works too!)
- Cookie cutters in Halloween shapes (optional)
- Toothpicks for texture and details
- Craft knife or blade for clean cuts
- Parchment paper for baking
- Small circle cutters or bottle caps for uniform shapes
Budget-Friendly Alternatives
- Use a rolling pin instead of an acrylic roller
- Bottle caps work as circle cutters
- Mix your own colors from primary clay colors
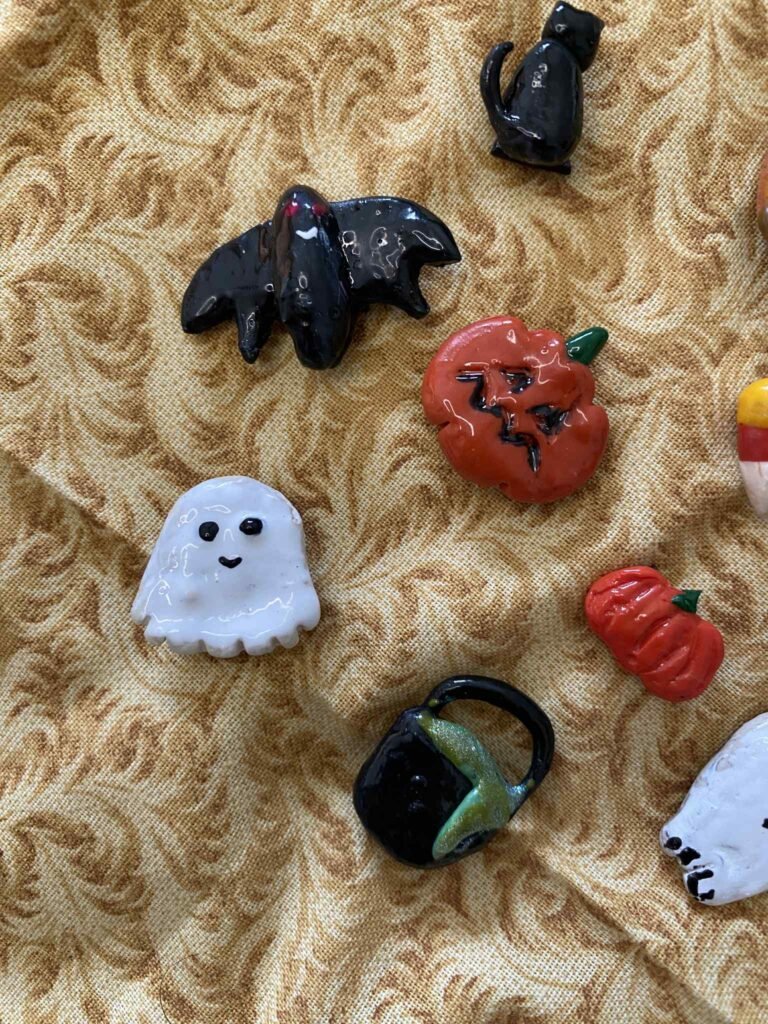
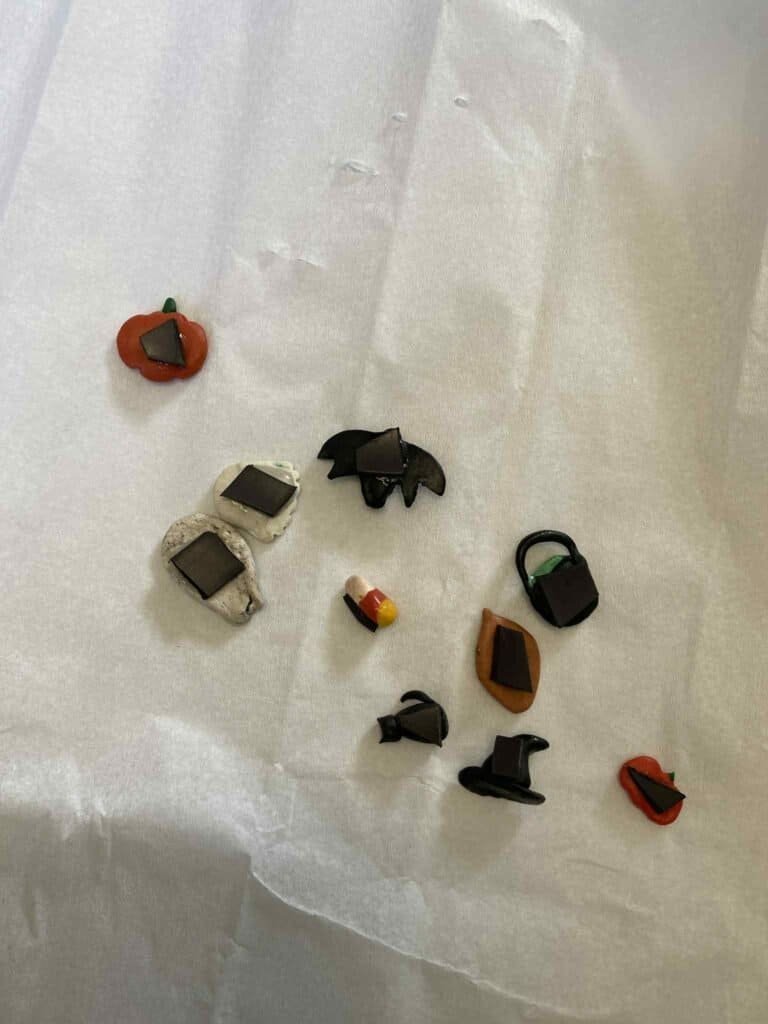
10 DIY Halloween Polymer Clay Magnets Designs
Beginner Designs (Perfect for First-Timers)
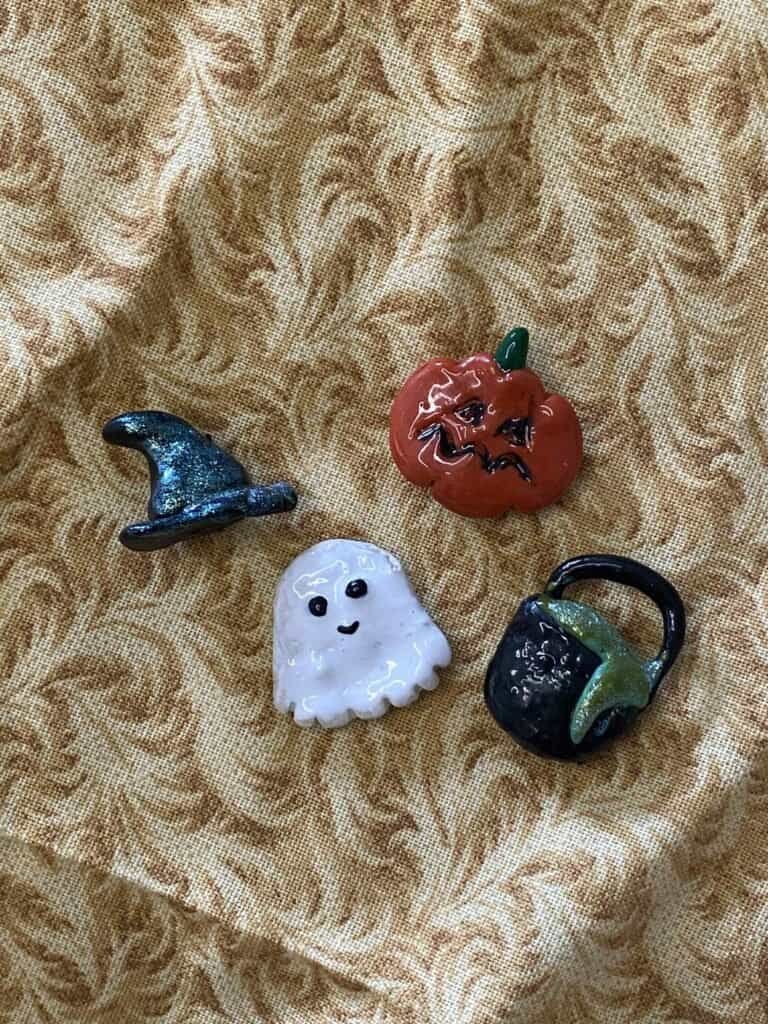
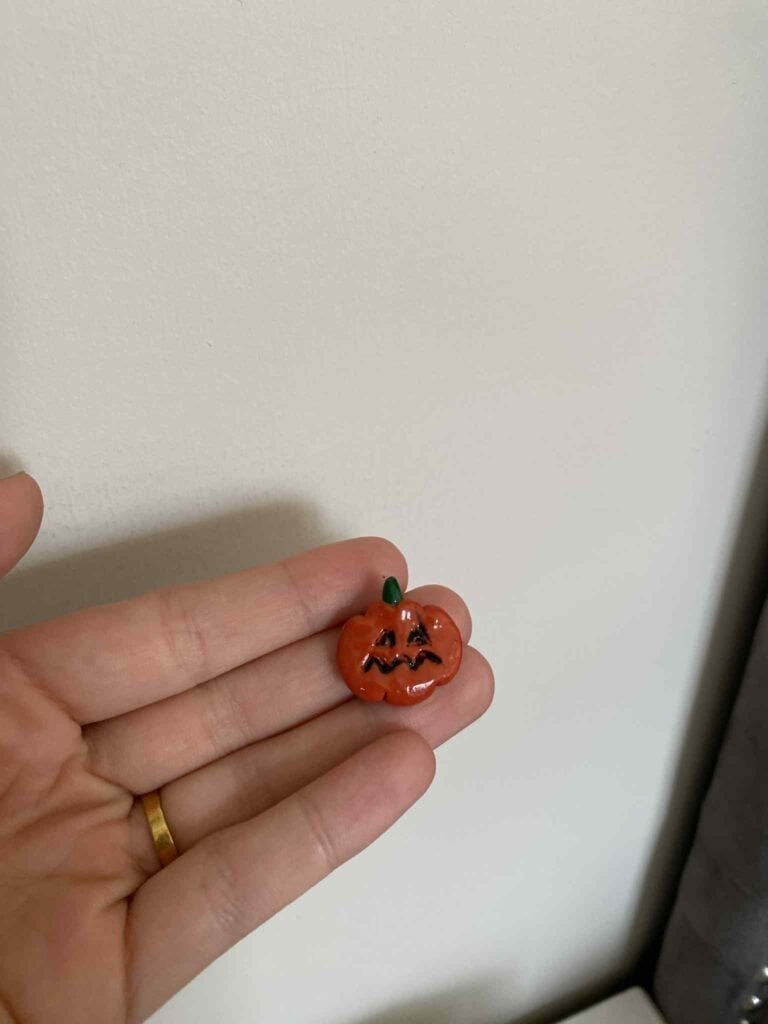
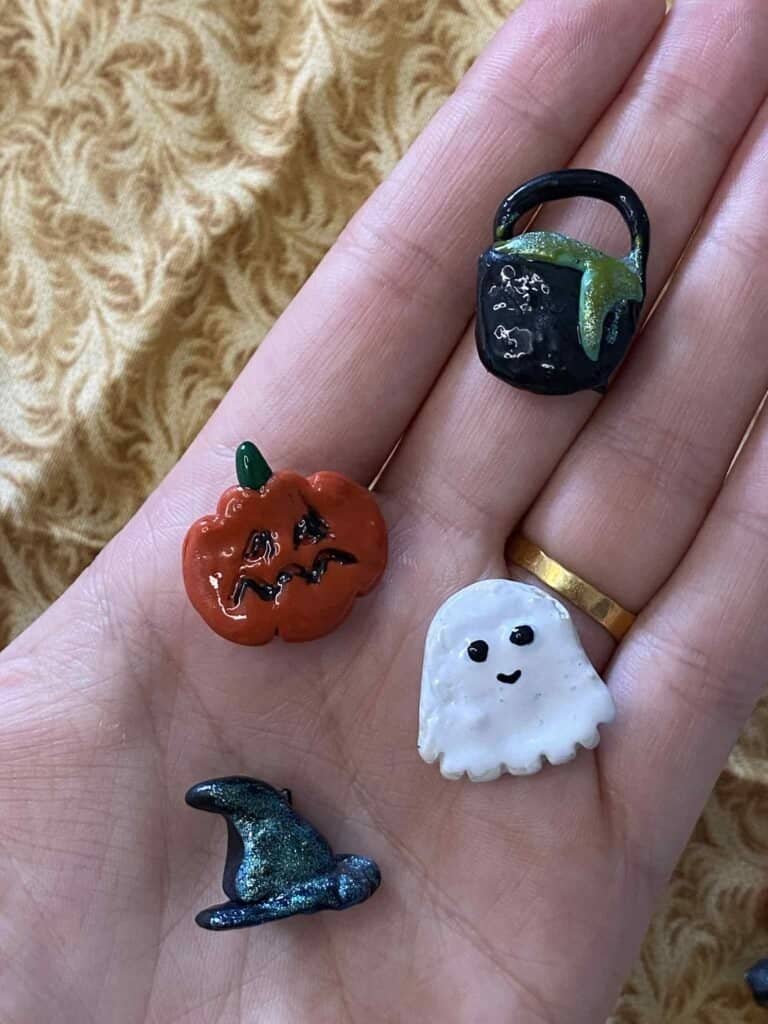
1. Classic Jack-o’-Lantern
Difficulty: Beginner | Time: 20 minutes
- Roll orange clay into a 1-inch ball
- Gently flatten to about 1/4 inch thick
- Use a toothpick to create triangle eyes and a zigzag mouth
- Add a small green stem on top
- Bake according to clay package directions
- Once baked, add with details carefully with black paint for the eyes and mouth. I use black gel paint.
- Once paint is set, use a top coat to seal it.
Pro Tip: Make several pumpkins with different expressions for variety!
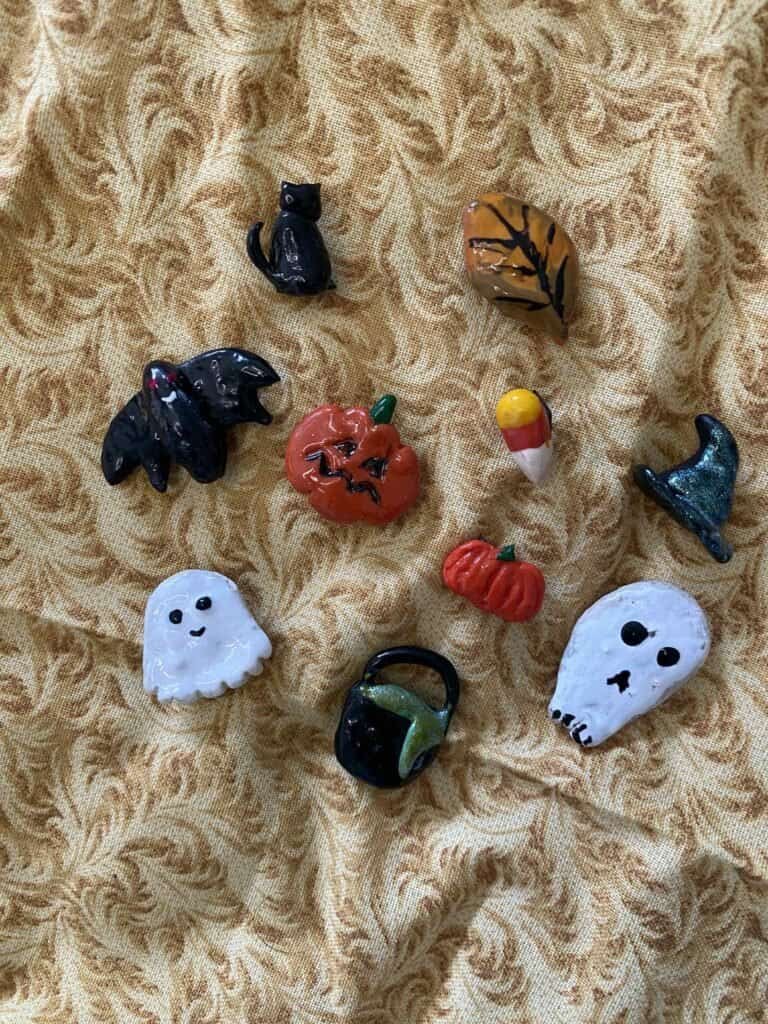
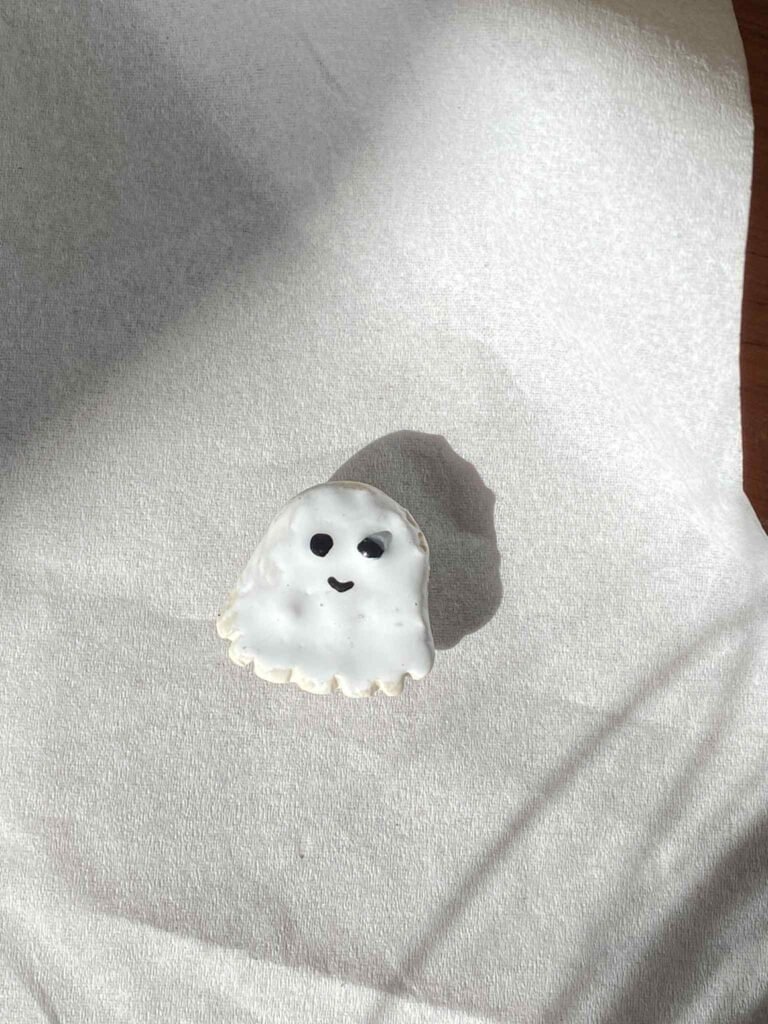
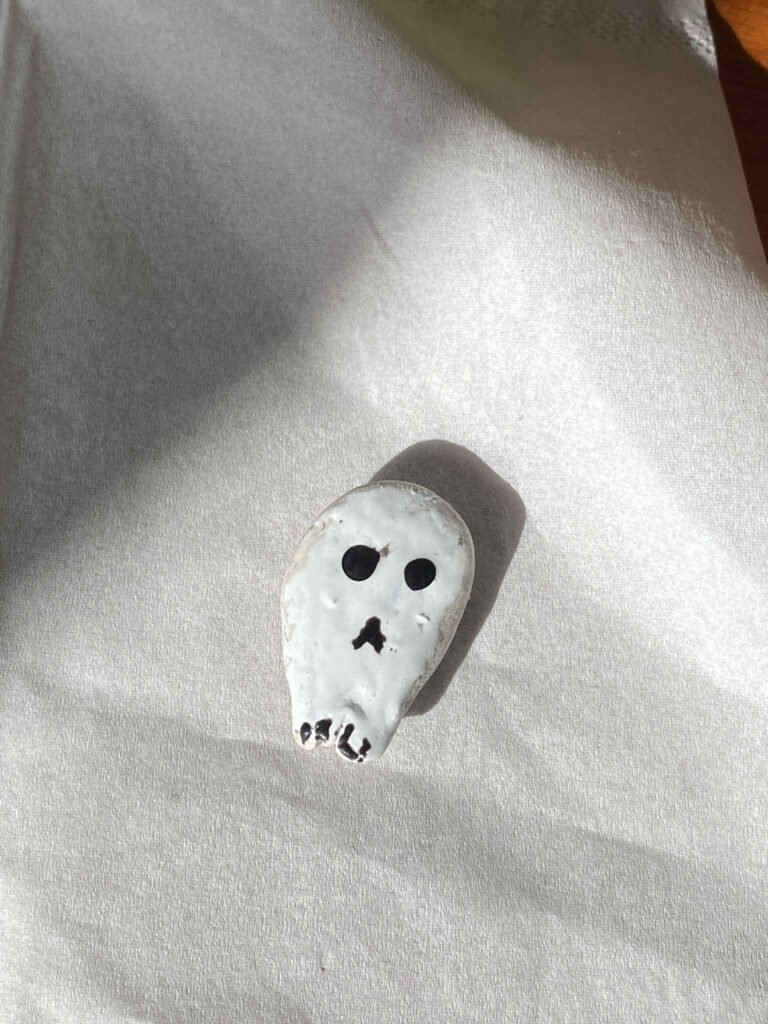
2. Friendly Ghost
Difficulty: Beginner | Time: 10 minutes
- Roll white clay into an oval shape
- cut a zig zag pattern along the bottom
- Use black paint dots for eyes after baking
- Add a small smile with a thin paintbrush
- Add varnish with a top coat to seal
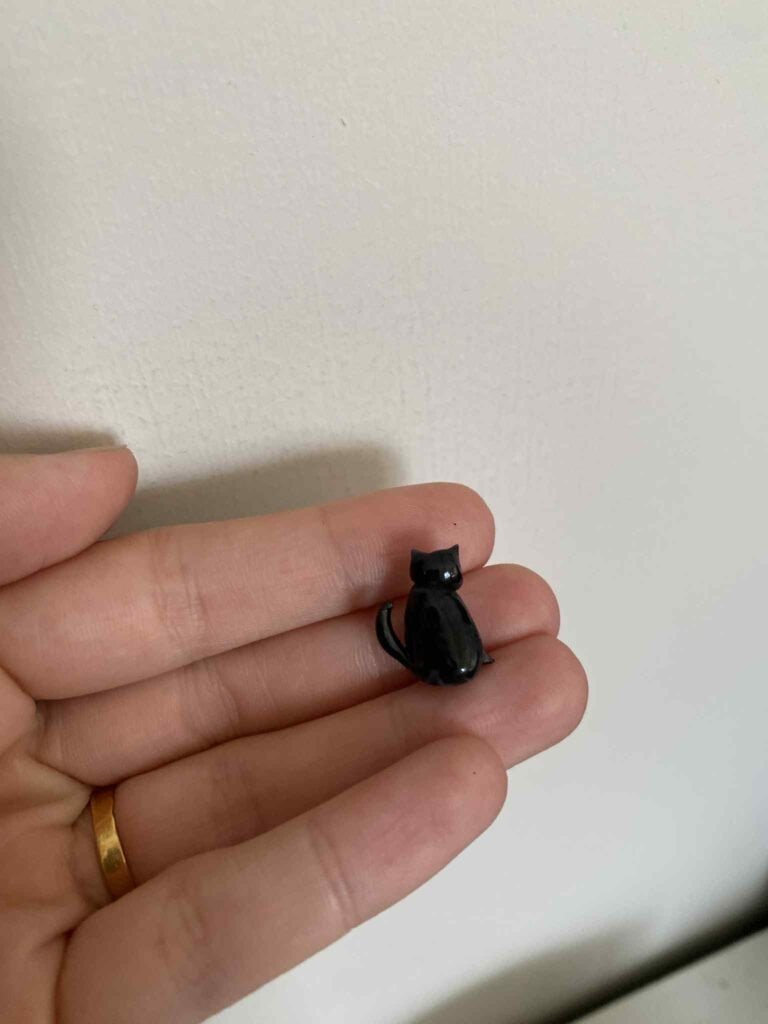
3. Simple Black Cat Silhouette
Difficulty: Beginner | Time: 10 minutes
- Create a black oval for the body
- Add a small circle for the head
- slightly pull the ears out of the head
- Add a tail
- Varnish with a top coat to seal
4. Pumpkin
Difficulty: Beginner | Time: 10 minutes
- Roll orange clay into a ball and flatten
- Use a toothpick to create pumpkin ridge lines
- Add a tiny green stem
- Seal with a top coat

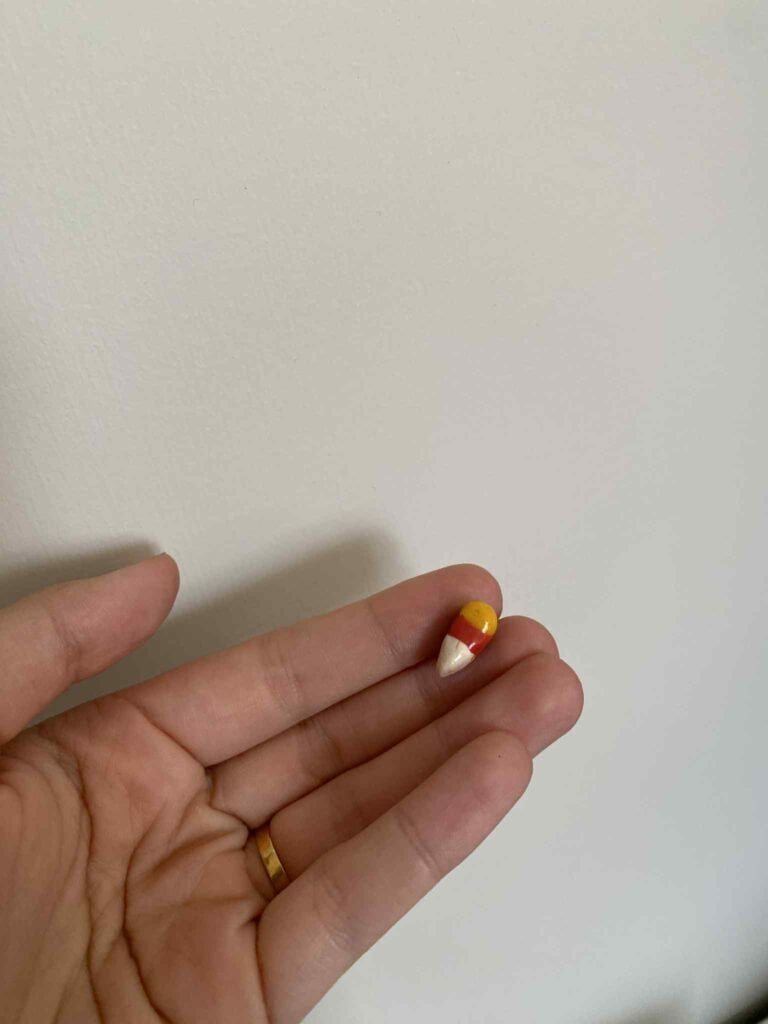
5. Candy Corn
Difficulty: Beginner | Time: 10 minutes
- Create white, orange, and yellow clay sections
- Stack and shape into classic candy corn triangle
- Smooth seams gently
- Perfect for practicing color blending!
- Seal with a Top coat/varnish
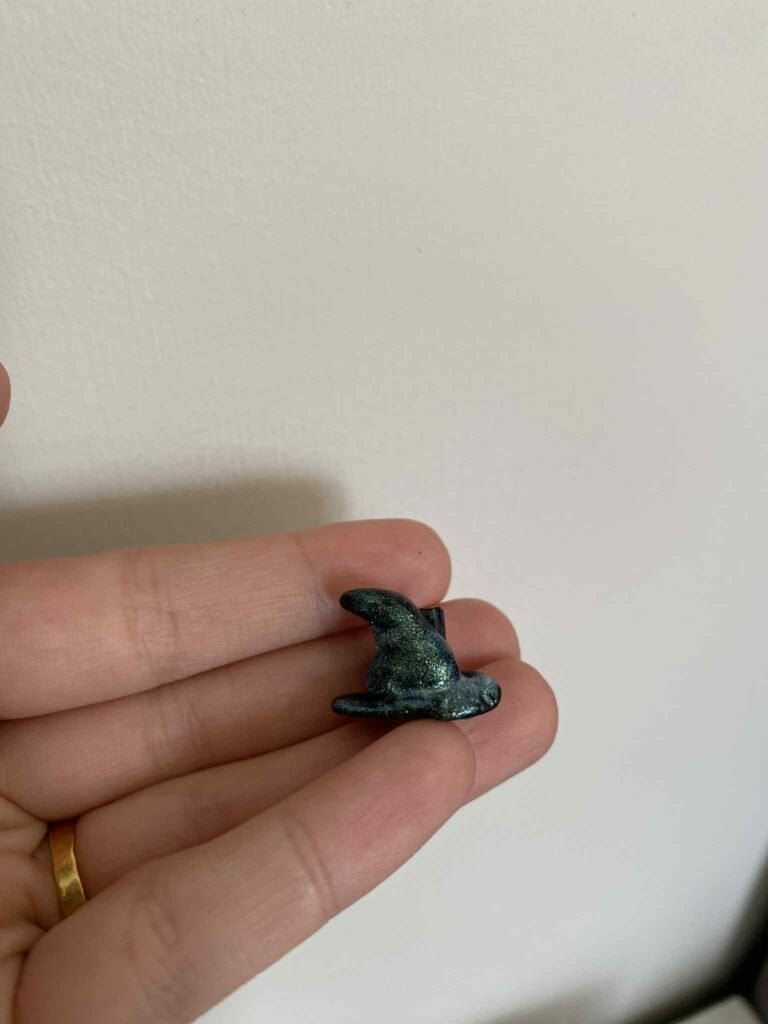
6. Witch’s Hat
Difficulty: Intermediate | Time: 15 minutes
- Roll black clay into a cone shape
- Flatten a circle for the hat brim
- Attach cone to center of brim
- bake
- Use a glitter top coat or a clear top coat, completely your choice
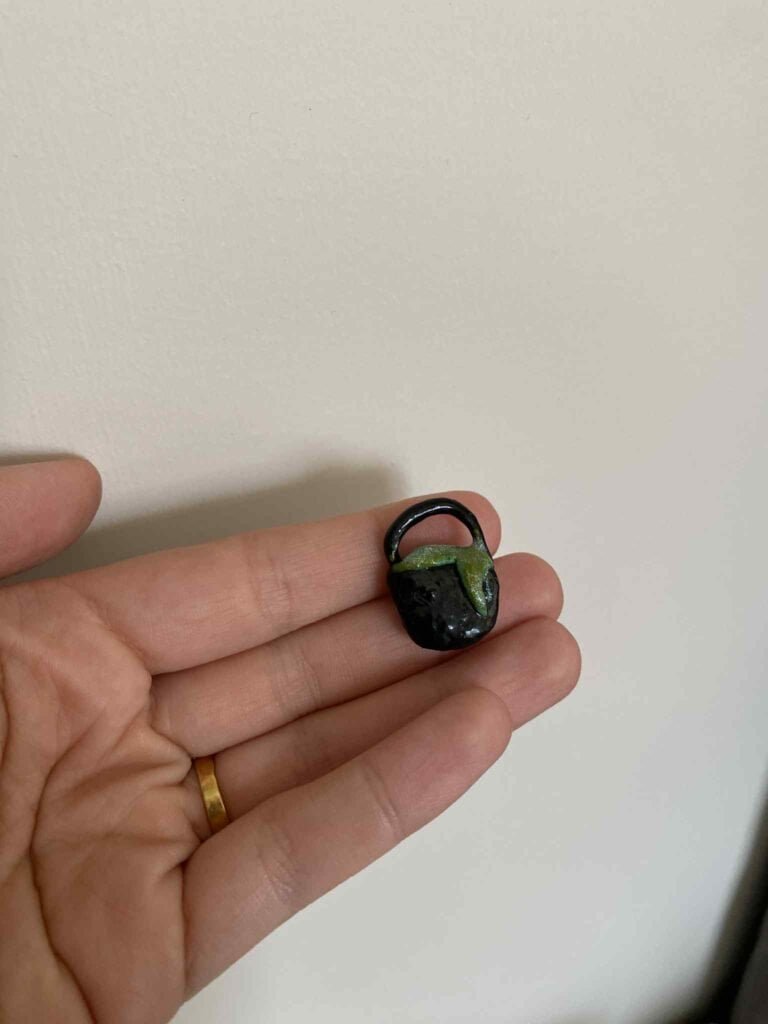
7. Miniature Cauldron
Difficulty: Intermediate | Time: 20 minutes
- Shape black clay into a small pot
- add a green clay to the top of the cauldron and make it flow over the edge
- Create a thin handle from black clay
- bake according to package instructions
- Paint a glitter top coat on the green clay and a clear coat on the rest of the cauldron
8. Autumn Leaf
Difficulty: Easy | Time: 10 minutes
- Mix orange, red, and yellow clay for autumn colors
- Shape into leaf form
- Use toothpick to create realistic vein patterns and bake
- Add subtle color variations for depth with paint and go over the veins with a darker color
- Use a Top coat to seal
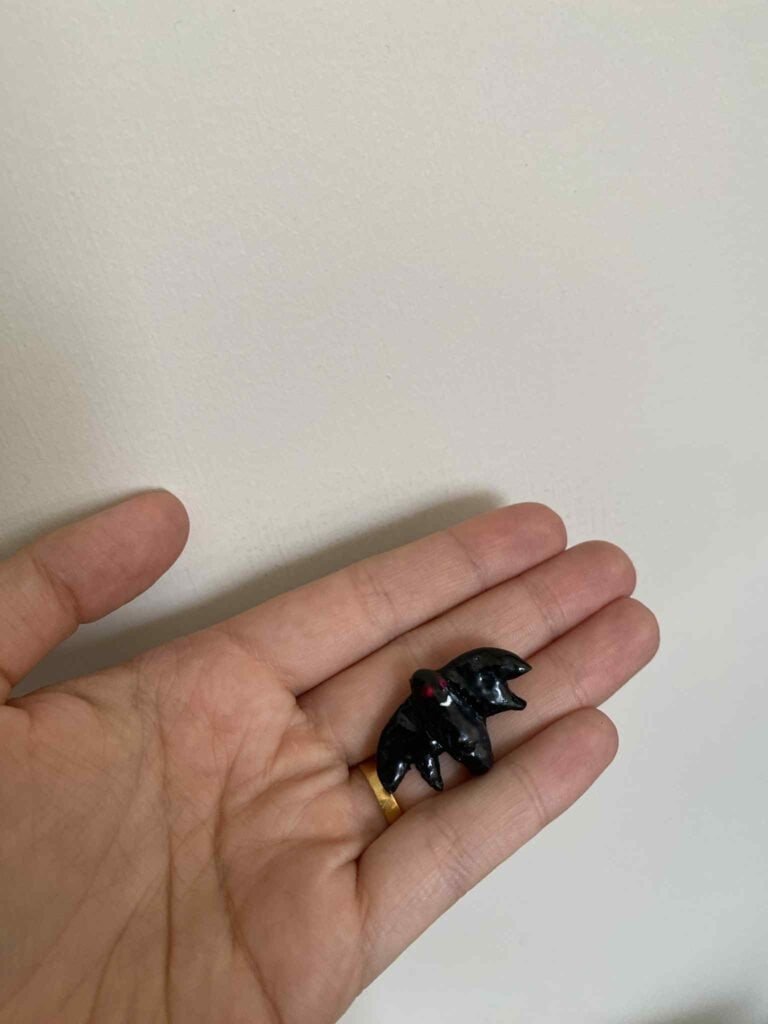
9. Vampire Bat
Difficulty: Intermediate | Time: 20 minutes
- Create black wing shapes (two triangular pieces)
- Make a small black body
- Attach wings to body and bake
- Use red paint for eyes and a small smile in white
- Use a Top coat to seal
10.Skull
Difficulty: Easy | Time: 10 minutes
- Shape white clay into 2D skull form
- Bake
- Paint fine details after baking, like nose, eyes and teeth
- Use a Top coat to seal
Step-by-Step Air Fryer Baking Instructions
Why I Use an Air Fryer for Polymer Clay
I switched to air fryer baking over the oven and never looked back! Here’s why it’s amazing:
- More consistent temperature: No hot spots like in regular ovens
- Faster preheating: Ready in 2-3 minutes vs. 10-15 minutes
- Energy efficient: Uses less electricity than a full oven
- Perfect for small batches: Ideal size for craft projects
- Better control: Easy to check pieces without losing heat
Preparing for Air Fryer Baking
- Preheat air fryer to 275°F (or temperature specified on clay package)
- Line air fryer basket with parchment paper (cut to fit, don’t let edges hang over)
- Place magnets on parchment, ensuring pieces aren’t touching
- Important: Leave space around each piece for air circulation
- If the parchment paper is flapping around, hold it down with a couple of tea spoons
Air Fryer Baking Tips
- Check constantly: Gently shake basket or rotate pieces if needed
- Don’t overcrowd: Work in batches if making many magnets
- Watch for browning: Especially white clay!…. but nothing a bit of paint cant fix. Air fryers can brown faster than ovens
Cooling and Finishing
- Remove basket and allow to cool completely (at least 20 minutes)
- Clay will be flexible when warm – this is normal!
- Once cool, clay should be hard
Attaching Magnets Like a Pro
Best Adhesive Options
- E6000: Strongest bond, weatherproof
- Super glue: Quick bond, good for indoor use
- Epoxy: Extremely strong, best for heavy magnets
Application Tips
- Apply small amount of adhesive to magnet
- Press firmly to back of clay piece
- Hold for 30 seconds, then set aside to cure
- Wait 24 hours before using for strongest bond
Magnet Placement
- Center the magnet for balanced hanging
- For oddly shaped pieces, place magnet at the heaviest point
- Test placement before gluing – hold piece against fridge to find best balance
- Cut the magnet so it covers majority of the back surface of the magnet .

Painting and Detailing Tips
When to Paint
- Always paint AFTER baking and cooling
- Clay must be completely cool to touch
Best Paint Types
- Acrylic craft paint: Affordable, good coverage
- Nail Polish – Glossy, afforable and probably on hand, i used gel.
- Top coat nail polish – for a glossy finish
Troubleshooting Common Issues
Clay Too Soft to Work With
Problem: Clay feels mushy or sticky
Solution: Chill in refrigerator for 30 minutes before working
Cracks After Baking
Problem: Visible cracks in finished pieces Solutions:
- Bake at slightly lower temperature next time
- Ensure clay isn’t too thick
- Cook for less time especially in the air fryer
Paint Won’t Stick
Problem: Paint beads up on clay surface
Solutions:
- Clean clay with rubbing alcohol before painting
- Use primer designed for plastic/clay surfaces
- Try different paint brand
Magnets Fall Off
Problem: Magnets detach from clay
Solutions:
- Use stronger adhesive
- Roughen both surfaces slightly before gluing
- Ensure both surfaces are completely clean
Conclusion
Creating these DIY Halloween polymer clay magnets if a craft for all! Its a wonderful way to add festive touches to your home while advancing your crafting skills and unlocking creativity. These are great to make with kids, make as gifts and a great asset to your Halloween seasonal décor.
The best part? Once you have got the hang of making these magnets, you can make all sorts of things and not just magnets suitable for all seasons, christmas valentines, birthdays, the list is endless. Polymer clay is incredibly versatile and magnets is jsut the beginning of what can be created with them. Stay tuned because i will be sharing more tutorials on simple crafts with polymer clay.
Remember crafting is about unleashing your creativity, it shouldn’t feel stressful and it should feel enjoyable. Not every design will turn out as imagined and that’s okay! Any craft takes time to master, so practice more and enjoy the process.
If you love Halloween crafting, check out these posts too!
Wooden Halloween Serving Board DIY (Perfect for snacks !)
DIY Ghost Polymer Clay Candle Holder
Easy DIY Halloween Tapered Candles | Fun & Spooky Craft Tutorial
Ready to Start Crafting?
Gather your supplies, choose your first design, and lets get started! Share photos of your finished magnets on social media. I love seeing how crafters put their own spin on these projects!
Pin this post for easy reference, and don’t forget to check back for more polymer clay tutorials and seasonal craft ideas. Happy Halloween crafting!
What’s your favorite Halloween magnet design from this list? Have you worked with polymer clay before, or will this be your first project? Let me know – I love connecting with fellow crafters!