Embroidery Thread Organization and Storage Ideas: Tips and Tricks for Keeping Your Threads Tidy
Let’s talk about embroidery thread organization ideas. Are you an embroiderer with a chaotic collection of threads? Do you spend more time searching for the right color than actually stitching? You’re not alone! Many embroiderers struggle with thread organization. But fear not! This comprehensive guide will provide you with a variety of embroidery thread organization ideas and tips and tricks to help you tame your thread chaos and create a more efficient and enjoyable embroidery experience.
Why Organize Your Embroidery Threads?
Before diving into the solutions, let’s talk about why thread organization matters.
A well-organized thread collection offers several benefits:
Saves Time: Quickly finding the right thread color eliminates frustrating searches and saves valuable stitching time.
Reduces Frustration: A tidy workspace promotes a calm and focused embroidery experience.
Protects Your Threads: Proper storage prevents tangles, breakage, and color fading.
Improves Creativity: Easy access to your threads inspires creativity and allows for spontaneous projects.
*** This post may contain affiliate links. This means that if you click and buy something, I may receive a small commission, at no extra cost to you. I only recommend products I genuinely believe in. ***
Embroidery Thread Organization Methods:
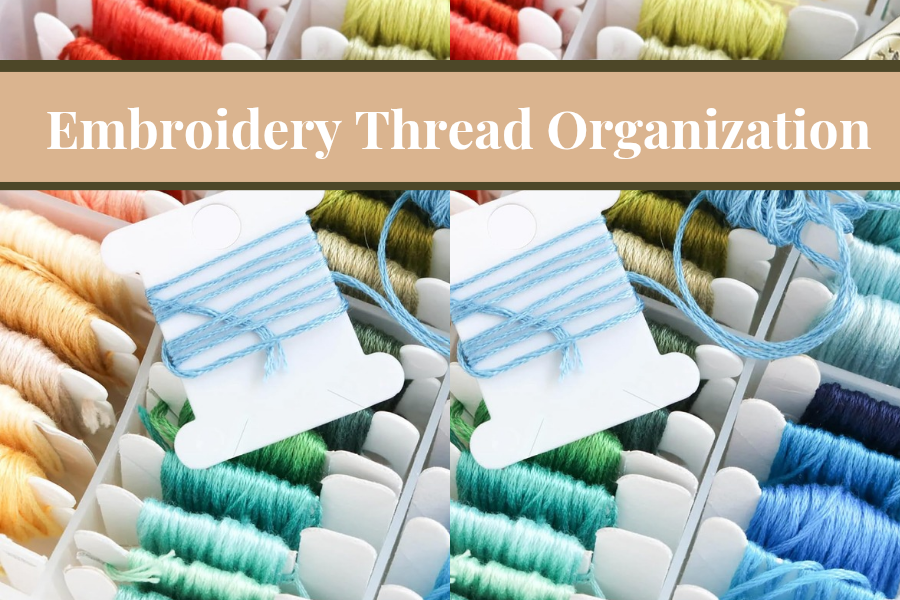
Here are several effective methods for organizing your embroidery threads, catering to different budgets and storage spaces. Most not if all methods require the thread or floss to be wound around a spool or embroidery floss cards to keep the floss neat and not tangled. Below are linked embroidery cards and spools.
Card:


1. The Drawer Divider Method:
What you need: A drawer, drawer dividers (adjustable ones are best!), and small containers or spools.
How it works: Divide your drawer into sections based on thread type (e.g., cotton, silk, metallic) or color family (e.g., warm tones, cool tones). Store threads in small containers or on spools within each section. Label each section clearly.
Pros: Affordable, easy to implement, keeps threads dust-free.
Cons: Requires drawer space, may not be suitable for large thread collections.

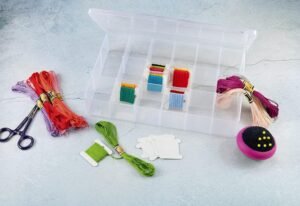
2. The Thread Box Method:
What you need: A thread box (many are available online or at craft stores), and small containers or spools.
How it works: Use a thread box with compartments to store your threads. Organize by color, type, or project.
Pros: Portable, keeps threads organized and protected.
Cons: Can be expensive, limited capacity depending on the size of the box.
3. The Wall-Mounted Organizer Method:
What you need: A wall-mounted organizer (pegboard, magnetic strip, or a custom-built system), and small containers or spools.
How it works: Mount an organizer on your wall and hang your threads using hooks, magnets, or small containers.
Pros: Saves drawer space, visually appealing, easy access to threads.
Cons: Requires wall space, may not be suitable for all types of threads.

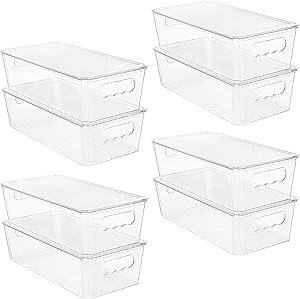
4. The Clear Storage Container Method:
What you need: Clear storage containers (various sizes), labels.
How it works: Store your threads in clear containers, labeled by color or type. Stack containers for easy access.
Pros: Affordable, versatile, protects threads from dust and damage.
Cons: Can be bulky if you have a large thread collection.
5. The Digital Inventory Method:
What you need: A spreadsheet or database program. Excel etc.
How it works: Create a digital inventory of your threads, including color names, thread types, and quantities. This helps you track your collection and plan projects.
Pros: Easy to search and update, helps prevent duplicate purchases.
Cons: Requires some technical skills.
Tips and Tricks for Keeping Your Threads Tidy:
Wind your threads onto spools or bobbins: This prevents tangles and makes them easier to store.
Use thread labels: Label your threads with color names or numbers for easy identification.
Regularly purge your threads: Get rid of threads you rarely use to prevent clutter.
Choose a system that works for you: Don’t be afraid to experiment with different methods until you find one that suits your needs and preferences.
Organizing your embroidery threads doesn’t have to be a daunting task. By implementing these ideas and tips, you can create a more efficient and enjoyable embroidery experience. Choose the method that best suits your space, budget, and preferences, and enjoy the satisfaction of a well-organized thread collection! Happy stitching!