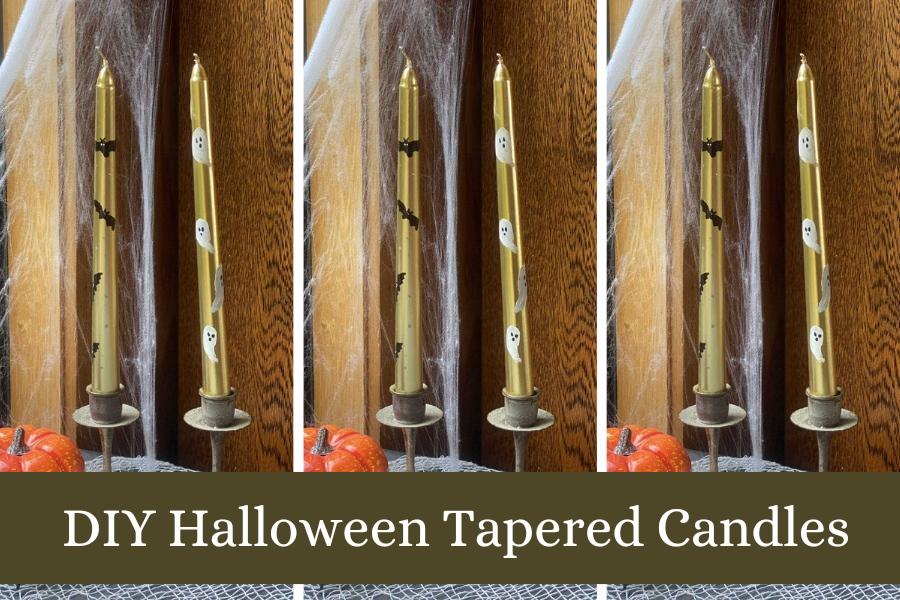
Let’s make DIY Halloween tapered candles. Halloween is creeping closer – and what better way to set the mood than by turning everyday candles into spooky statements? In this easy DIY tutorial, I’ll show you how to transform plain taper candles into charming Halloween décor using just paint and a little creativity. Perfect for mantel displays, party décor, or spooky gifting.
Materials You’ll Need:
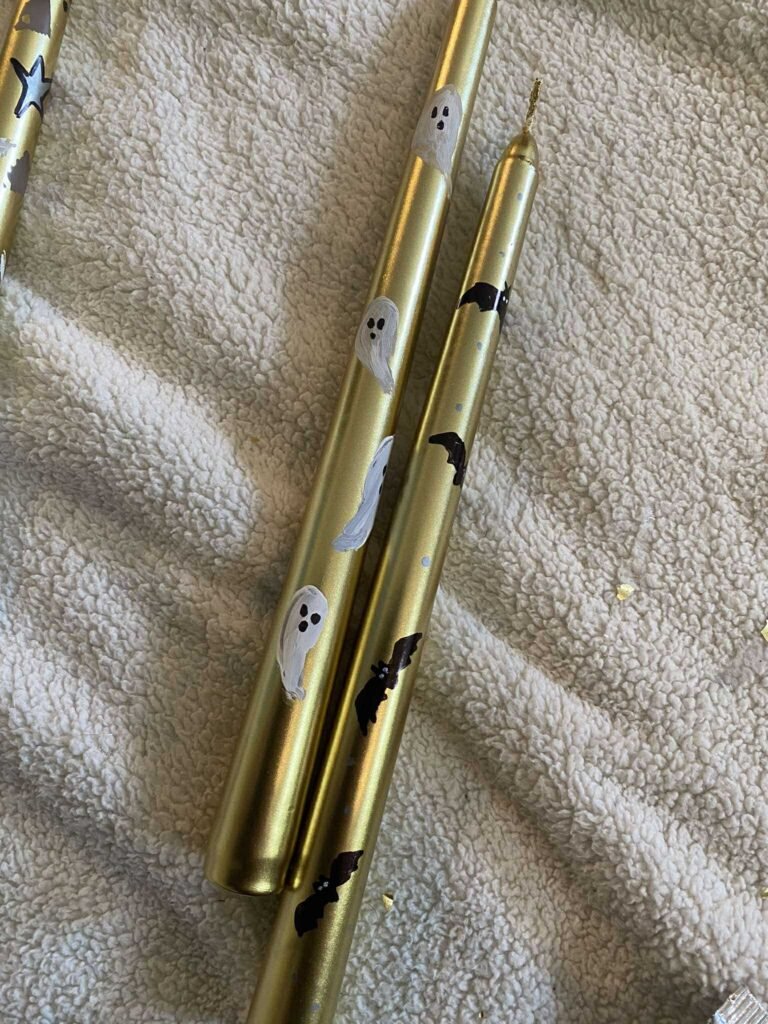
- Plain Candles: Choose candles in your desired shape and size. White, black, gold or silver are great colors for Halloween in my opinion.
- Acrylic Paints: for this tutorial I use only white and black paint.
- Paintbrushes: A variety of sizes will be helpful for different details, but with delicacy one smaller sized brush is fine.
Directions
Step 1: Prepare Your Candles
Make sure the candle is clean, if you don’t want to free hand your designs onto the candle. Pencil them in first.
Step 2: Paint Your Spooky Designs
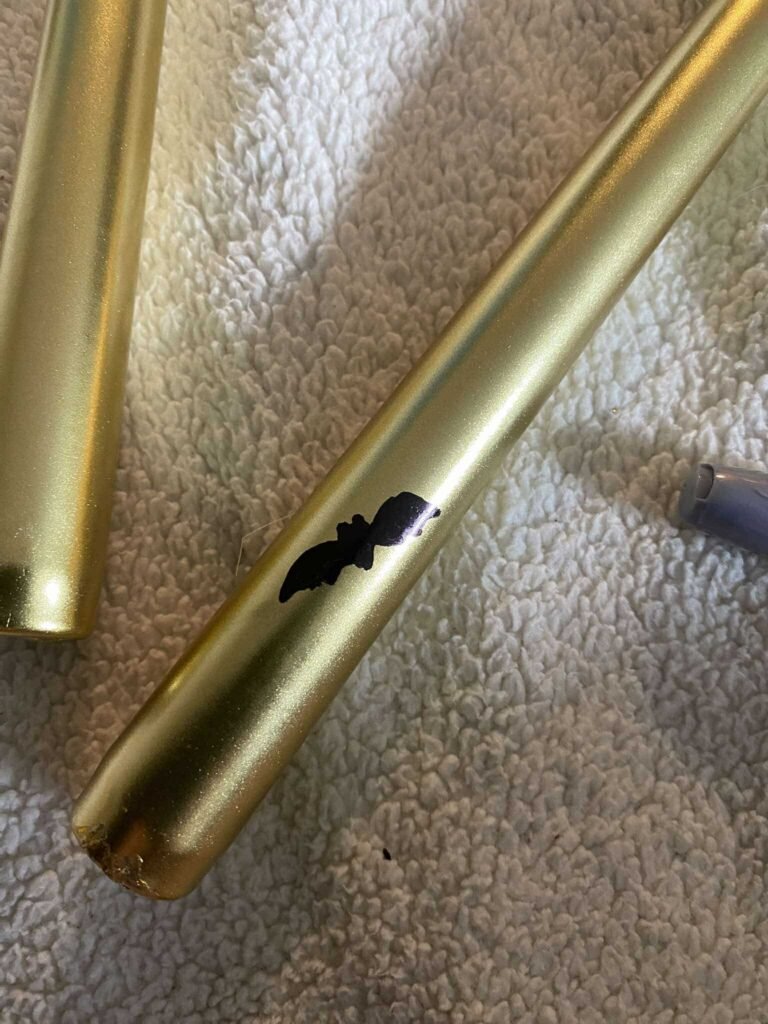
Bat Candle:
Outline: Use a thin brush and black paint to outline the bat’s wings and body on the candle.
Fill In: Use a slightly larger brush to fill in the bat’s wings and body with black paint.
Details: Add details like eyes with white paint
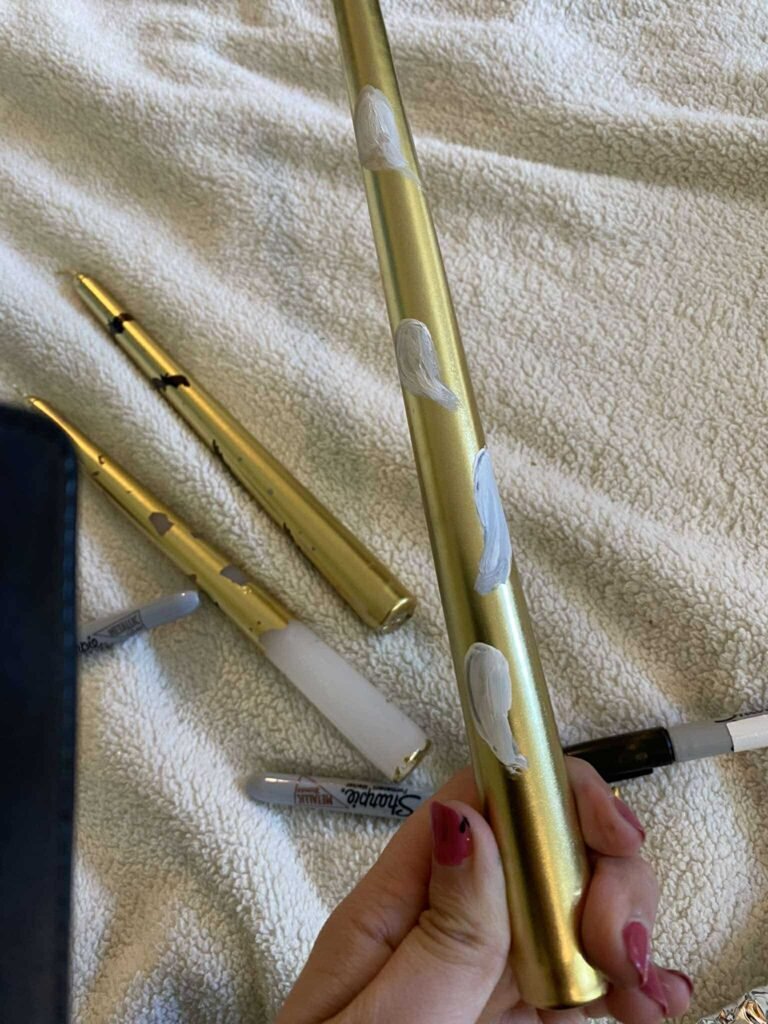
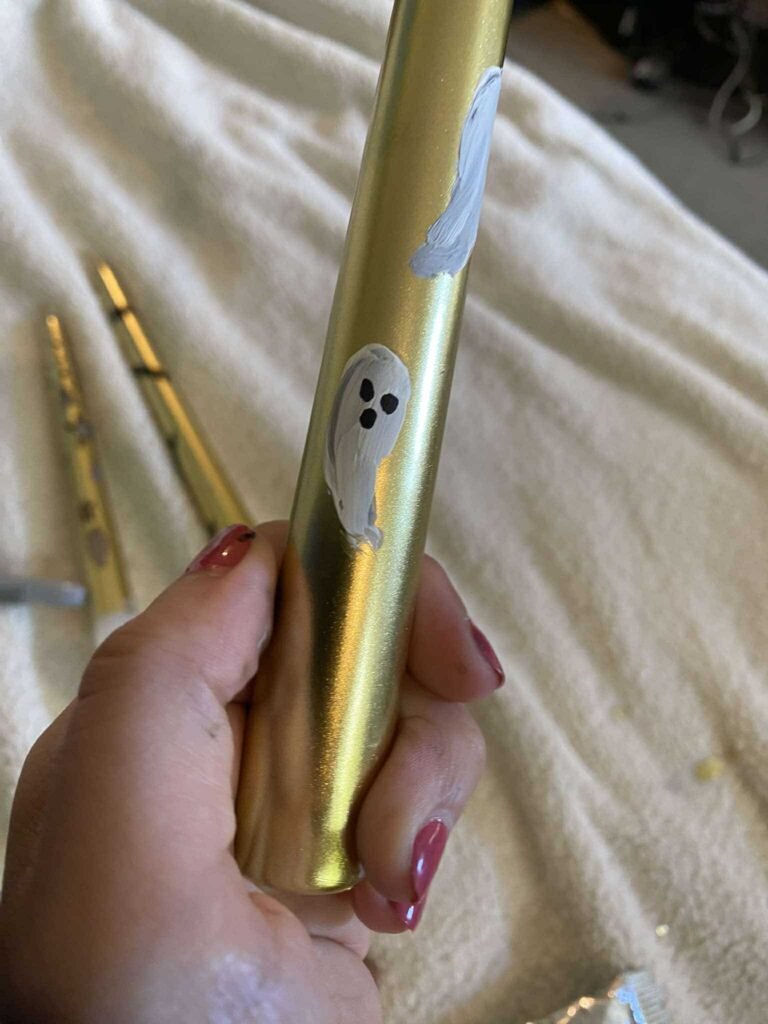
Ghost Candle:
Outline: Use white paint and a thin brush to outline the ghost’s shape on the candle.
Fill In: Use a larger brush to fill in the ghost’s body with white paint.
Details: Add a few dots for eyes and a curved line for a mouth.
Step 3: Let It Dry
Patience is Key: Allow the paint to dry completely before handling the candles. If the paint is not opaque do another coat.
Enjoy your Spooky Creations
Now that you’ve created your own Halloween-themed candles, proudly display them around your home to add a touch of spooky charm to your decor.