How to Make Beautiful DIY Decoupage Candles with an Iron (No Mod Podge Required!)
Transform ordinary candles into stunning decorative pieces with this simple iron technique for DIY decoupage candles.
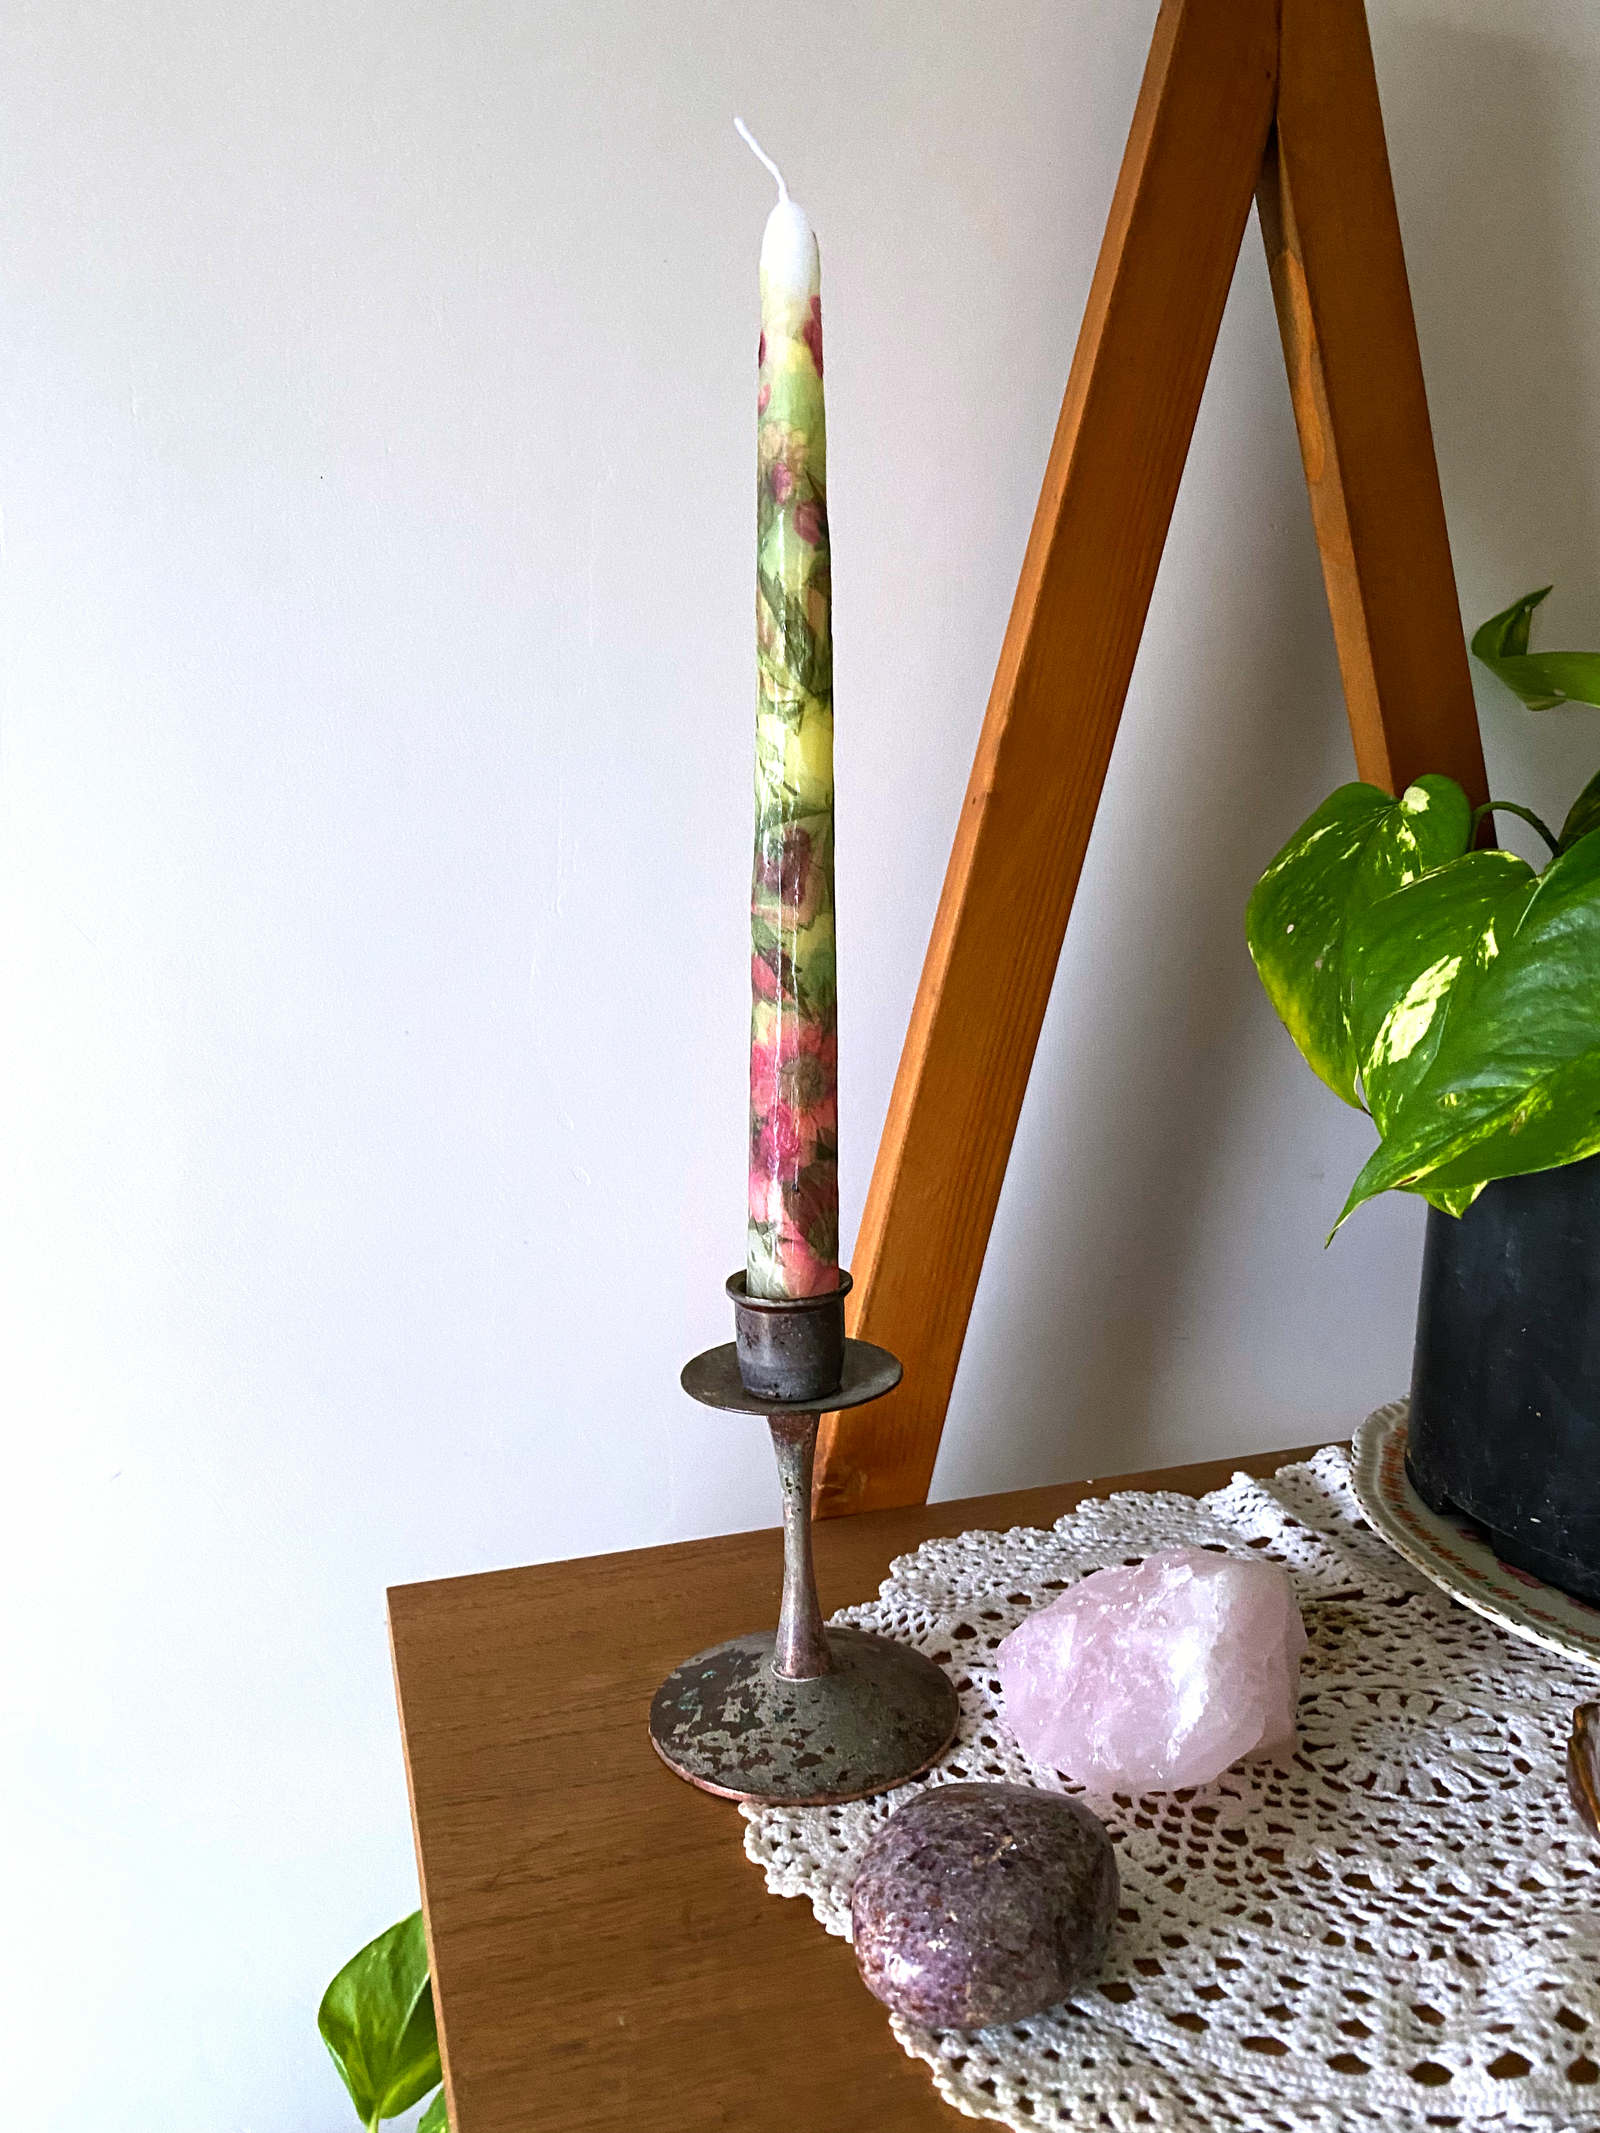
Have you ever wanted to create beautiful decorative candles but didn’t have Mod Podge on hand? This simple technique uses just an iron and decorative napkins to create gorgeous decoupage candles that look professionally made, all things you probably have on hand. The heat from the iron melts the candle wax slightly, allowing the tissue paper to adhere perfectly without any additional adhesive.
Perfect for any occasion, these candles can be customized for Christmas, Halloween, birthdays, or everyday home décor. I’ve created candles with floral designs because they work beautifully year-round and mainly because flowers are my favorite.

⚠️ Important Safety Note
These candles are for decorative purposes only. I have not tested burning these candles, and the added paper may create a fire hazard. Please display these beautiful creations safely and never leave them unattended if you choose to light them.


DIY Decoupage Candles | What You Need:
- candles
- tissue paper/napkin
- wax paper or baking paper
- iron
Time : 5 Minutes per candle
Difficulty Level: Easy/Beginner
DIY Decoupage Candles | Iron Method Tutorial
STEP 1:
Firstly grab the napkin of your choice and separate the two layers. This is a little bit tricky to do and you might have to use your nails to be able to pull them apart. The layers should be quite thin so we only need the pattern layer, not the blank white layer. Refer to the photos below.
STEP 2:
Decide how you want to decorate your candle:
- Full wrap: Cut the tissue to wrap around the entire candle
- Accent pieces: Cut out specific areas on the napkin like flowers or patterns
I recommend trying both approaches to see which style you prefer!
STEP 3:
Carefully wrap or place your tissue paper pieces exactly where you want them on the candle. Take your time with this step.
Cover the entire area with wax paper or parchment paper or baking paper to protect both your iron and the delicate tissue.
STEP 4:
Iron Heat setting: Medium heat (avoid high heat which can melt your candle)
Gently press and glide the iron over the wax paper in smooth motions. The heat will slightly melt the candle wax, allowing it to soak through stick to the tissue paper. As the wax melts it will become easier to glide the iron around.
Important: Keep the iron moving! Holding it in one spot too long can change your candle’s shape or create indentations.
STEP 5:
Once you are happy with how the decoupage candles have come out and all of the paper is stuck down with the melted wax, it is ready to be displayed. However, you can run the iron straight onto the tissue paper if there are a few bits that are not sticking down properly although just make sure you clean your iron afterward.


Troubleshooting Tips | DIY Decoupage Candles
Paper keeps tearing? Try using napkins with slightly thicker paper, or be extra gentle when separating layers.
Design won’t stick? Your iron might not be hot enough, or you may need to apply pressure for a few extra seconds.
Candle shape changing? Reduce your iron temperature and keep it moving more quickly.
Wax on your iron? Clean it immediately with a damp cloth while the iron is still warm (but unplugged).
Creative Ideas & Variations
- Seasonal themes: Holly for Christmas, pumpkins for Halloween, hearts for Valentine’s Day
- Color coordination: Choose napkins that match your room’s color scheme
- Layered designs: Overlap different tissue papers for depth
- Mixed textures: Try combining different napkin patterns on one candle
Display and Storage
Since these are decorative candles, they’re perfect for:
- Centerpieces for special dinners
- Bedroom ambiance
- Seasonal mantle displays
- Gift giving (include a note about decorative use only)
Store in a cool, dry place away from direct sunlight to preserve the colors and prevent warping once the holiday you are celebrating is over.
This iron technique is such a game-changer for creating beautiful decoupage candles without the mess of traditional adhesives. The results look professional, and the process is surprisingly therapeutic and the best part of all, you probably have all the supplies needed for these DIY decoupage candles already!
I’d love to see your creations! So lets connect on Pinterest!
Did you enjoy this DIY, well maybe try these ones, I think you will like them
And that’s it your decoupage candles are complete, remember I have not tested lighting these and it could be a potential fire hazard so if you are going to light them be careful watch them constantly, and be in a safe environment. Thanks for following the tutorial I would love to see your results below.

Have you enjoyed this DIY decoupage candles tutorial?


