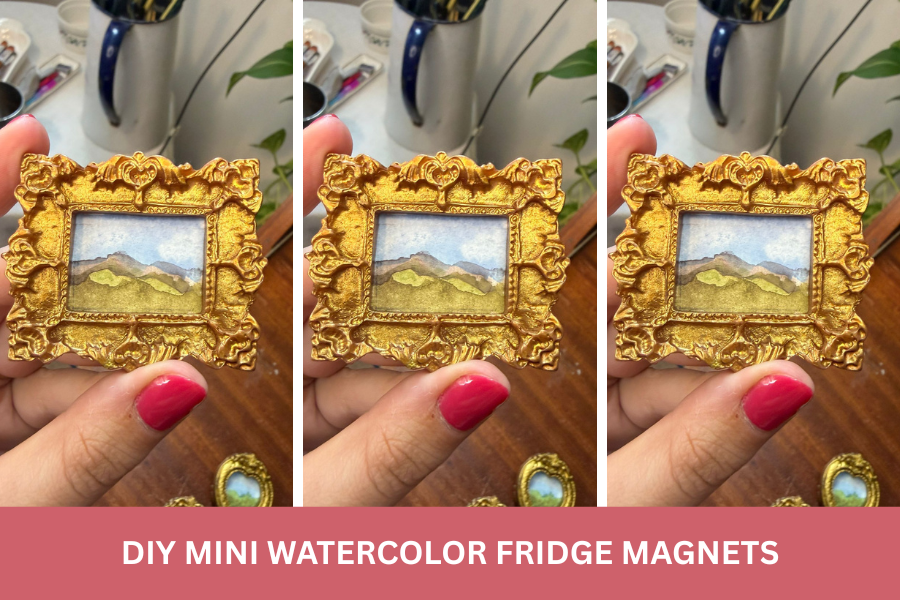
DIY Mini Watercolor Fridge Magnets (Using Vintage-Style Frames)
These mini watercolor fridge magnets are the perfect crafts. If tiny are and tiny home décor is your thing, these mini watercolor fridge magnets are the project for you. Can be made in an hour or less. They look like little gallery paintings for your fridge and way easier to make than they look.
This blog post contains affiliate links, which means I get a small commission at NO EXTRA COST to you if you choose to make a purchase via one of the links.
DIY Mini Watercolor Fridge Magnets
I sourced these ornate mini frames from Amazon, added tiny watercolor landscapes, and turned them into magnets. They also make beautiful handmade gifts. You can get the same frames here
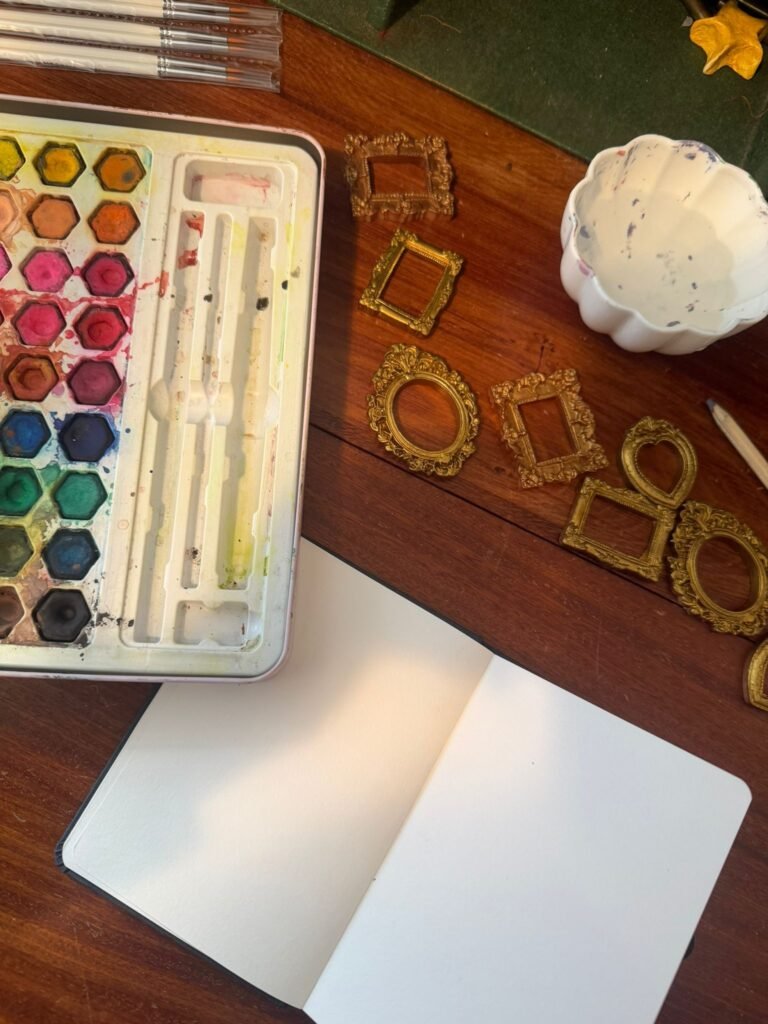
Materials You’ll Need
- Mini decorative frames (resin or plastic, Amazon works great)
- Watercolor paper
- Watercolor paints
- Fine paintbrushes (size 0–2)
- Pencil
- Scissors or craft knife
- Glue (I used hot glue, but other options work too)
- Small magnets or magnet strips
- Cardboard
Step 1: Prepare Your Frames
If your frames come with inserts or backing:
- Remove any plastic covers or inserts
- Clean the inside surface
Measure the inside opening, this will be the size of your mini paintings.
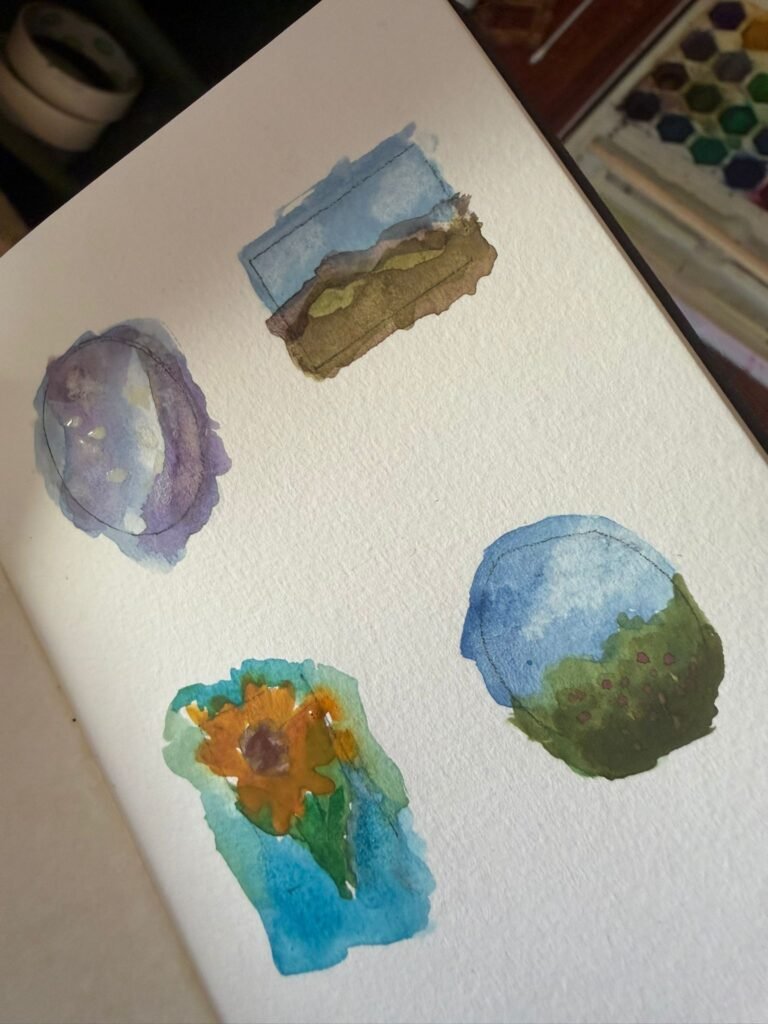
Step 2: Sketch Your Design
Keep your designs simple, details can be pretty difficult on a painting this scale.
Some ideas that work beautifully:
- Soft mountain landscapes
- Rolling green hills
- Blue skies with clouds
- Tiny floral fields
- Abstract color washes
Lightly sketch your design with pencil. ( skip this step if you want to go completely free hand )
Step 3: Paint Your Mini Watercolors
Example process:
- Paint a light blue sky wash
- Add green hills while the paper is slightly damp
- Layer darker tones for depth
- Add tiny details (like flowers or shadows) once dry
Let each piece dry completely before moving on.
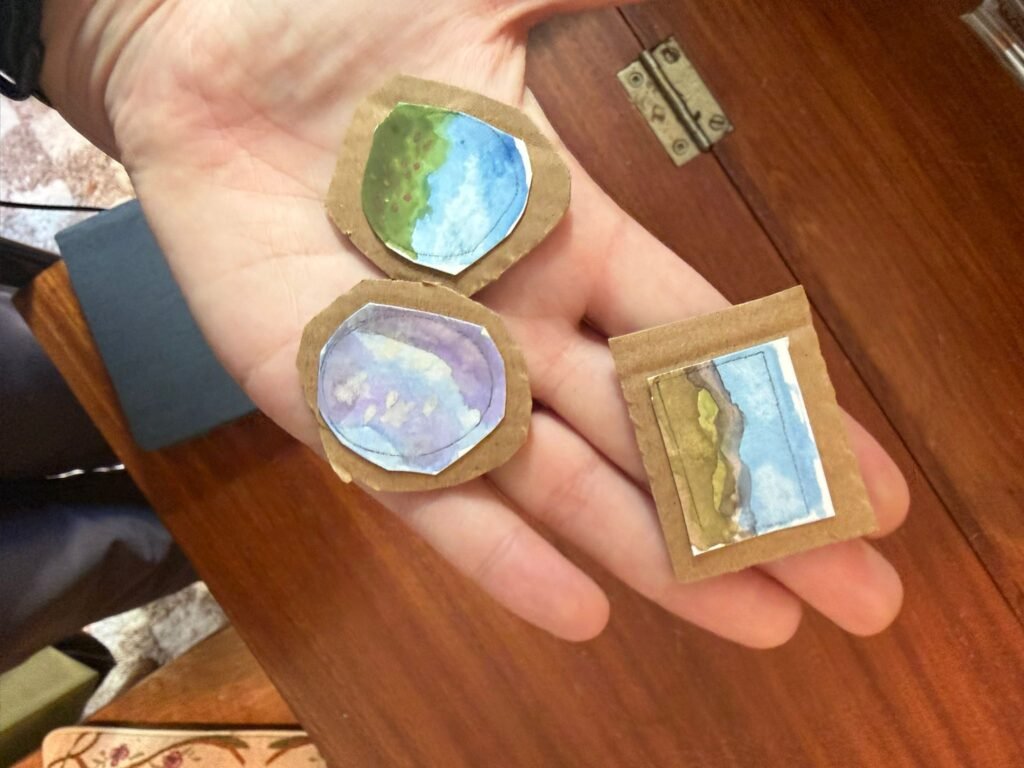
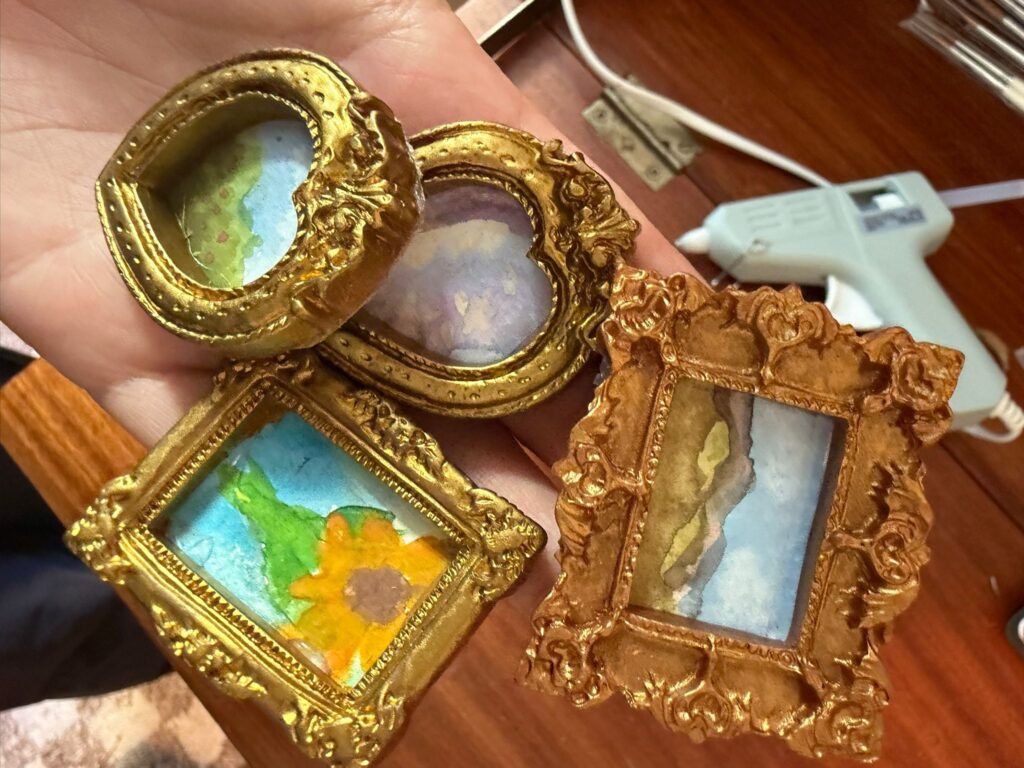
Step 4: Add Cardboard Backing
Once the paintings are dry, cut out the paintings and stick them onto a pieve of cardboard. This helps durability and gives us a nice backing to stick the magnet on. I used hot glue but super glue works too.
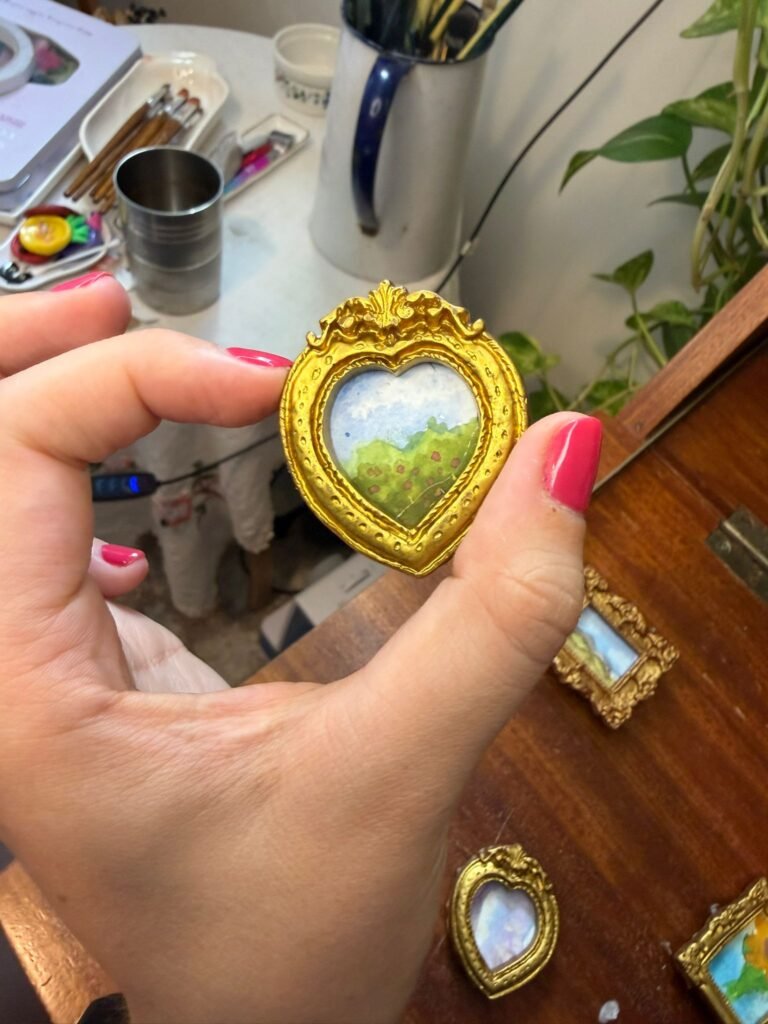
Step 5: Assemble the Frames
- Glue your watercolor piece into the frame
- Make sure it sits flat and centered
- Press gently and allow it to set
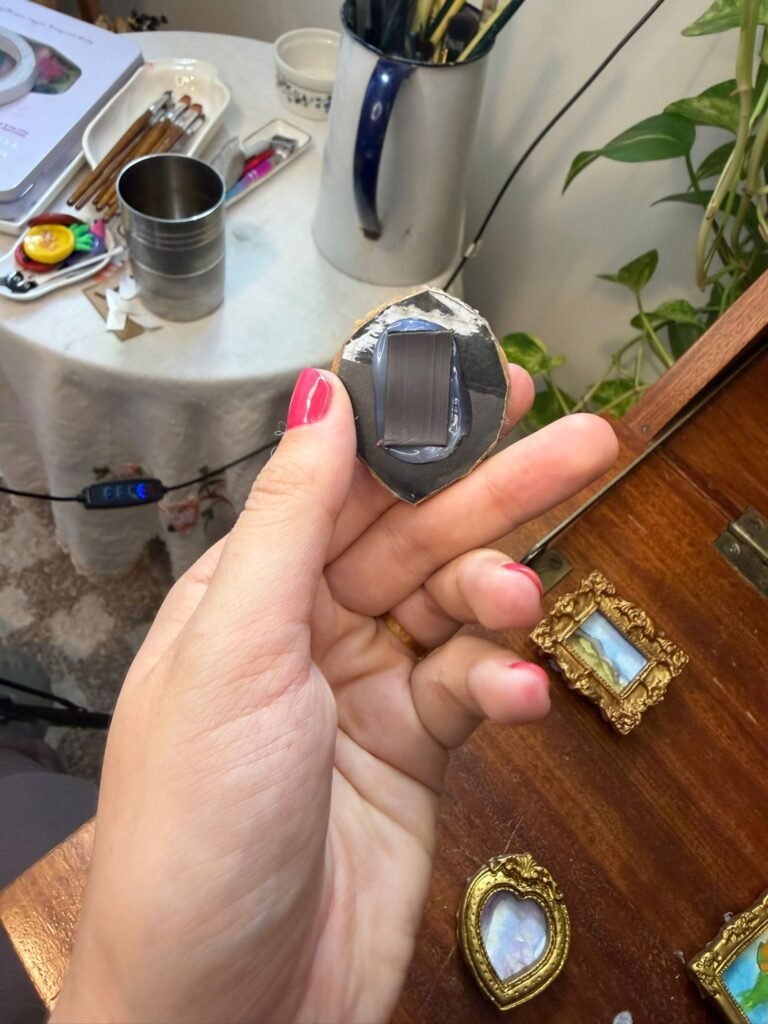
Step 6: Add Magnets
- Attach a magnet to the back of each frame using glue
- I used a hot glue gun, and it worked perfectly fine
- Super glue would work great too!

Tips for Selling These
These are a perfect craft to sell at craft markets.
- Sell in themed sets (e.g. landscapes, florals)
- Offer custom designs
- Use cute packaging (small boxes or backing cards)
- Market them as:
- “Mini watercolor art magnets”
- “Hand-painted fridge decor”
- “Cottagecore home accessories”
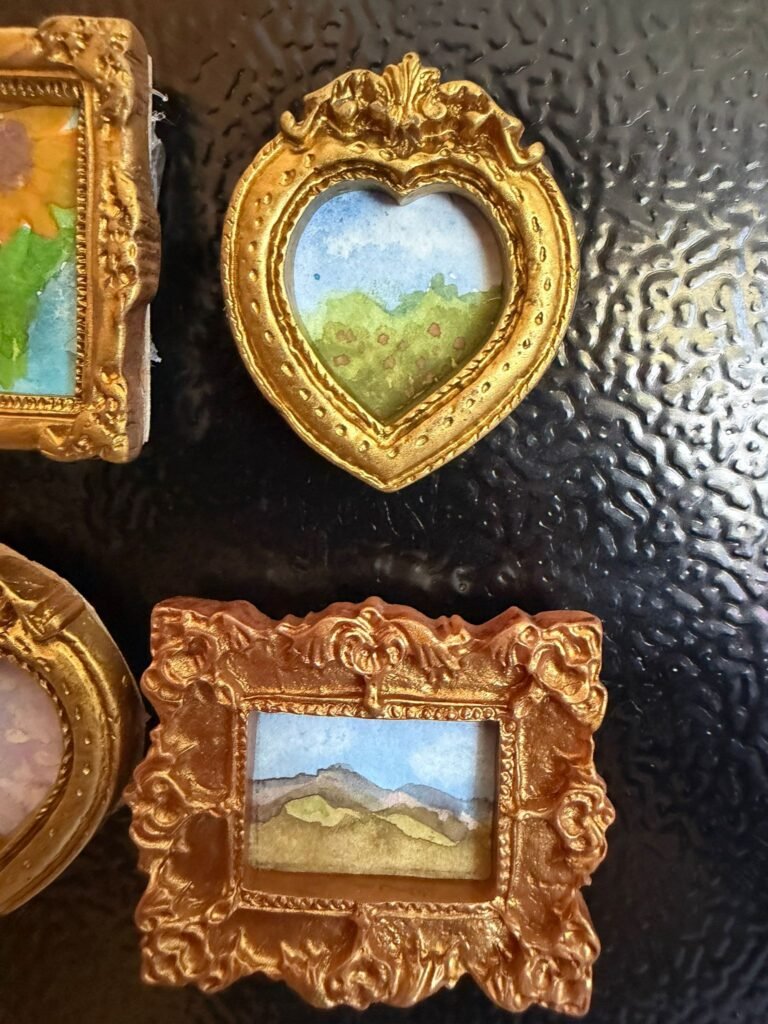
Final Thoughts
These mini watercolor magnets are a short and sweet craft that are simple to make. Each one turns out unique and looks elegant. Once you start making them, its hard to stop!