Needle felting is a relaxing and creative craft, but beginners often make small mistakes that can lead to broken needles, wasted wool, or projects that you just aren’t happy with. I know when I first started I sure did have a lot of projects that have never seen the light again. If you’ve ever wondered why your project feels and looks different than it should be, then this guide is for you.
In this guide, you’ll learn the most common needle felting mistakes beginners make, and exactly how to avoid them.
Here are 15 needle felting mistakes to never make, plus exactly how to avoid them.
This post may contain affiliate links *
Get You Beginner Needle Felting Kit Here
Confused on what needle felting kit to buy as a beginner, check this one out, it has everything you need to succeed! GET IT HERE
1. Using the Wrong Type of Wool
Not all wool is felts the same. Using super smooth or slippery wool (like some merino tops) can make felting painfully slow, but it is great for the finishing touches.
Avoid it by:
- Starting with coarse core wool for shaping, not too course because that will be very difficult, trust me I made this mistake one too many times.
- Using finer wool only for surface details and colour
2. Skipping Core Wool Altogether
Many beginners try to build entire projects using colored wool. This wastes good wool and takes much longer to felt.
Avoid it by:
- Creating the base shape with cheap core wool
- Adding coloured wool as a thin outer layer
- If you don’t have course wool and are working on a large project. try use tinfoil to make the base shapes.
3. Stabbing Too Aggressively
Felting harder doesn’t mean felting faster. Aggressive stabbing leads to bent needles and broken off tips.
Avoid it by:
- Using light, controlled pokes
- Let repetition do all the work, this is suppose to be the relaxing part!
4. Felting at an Angle
Stabbing at an angle is one of the fastest ways to snap a needle…. trust me on this one.
Avoid it by:
- Always stabbing straight in and straight out
- Slowing down
5. Not Using a Felting Mat
Felting directly on a table or your lap is going to break needles or break skin.
Avoid it by:
- Using a foam, wool, or brush mat. I personally use a foam mat, but they do wear out.


6. Rushing the Firming Stage
If your base shape isn’t firm, your finished piece will look lumpy.
Avoid it by:
- Spending extra time compacting the core
- Testing firmness by gently squeezing the piece, the main body should feel and be firm
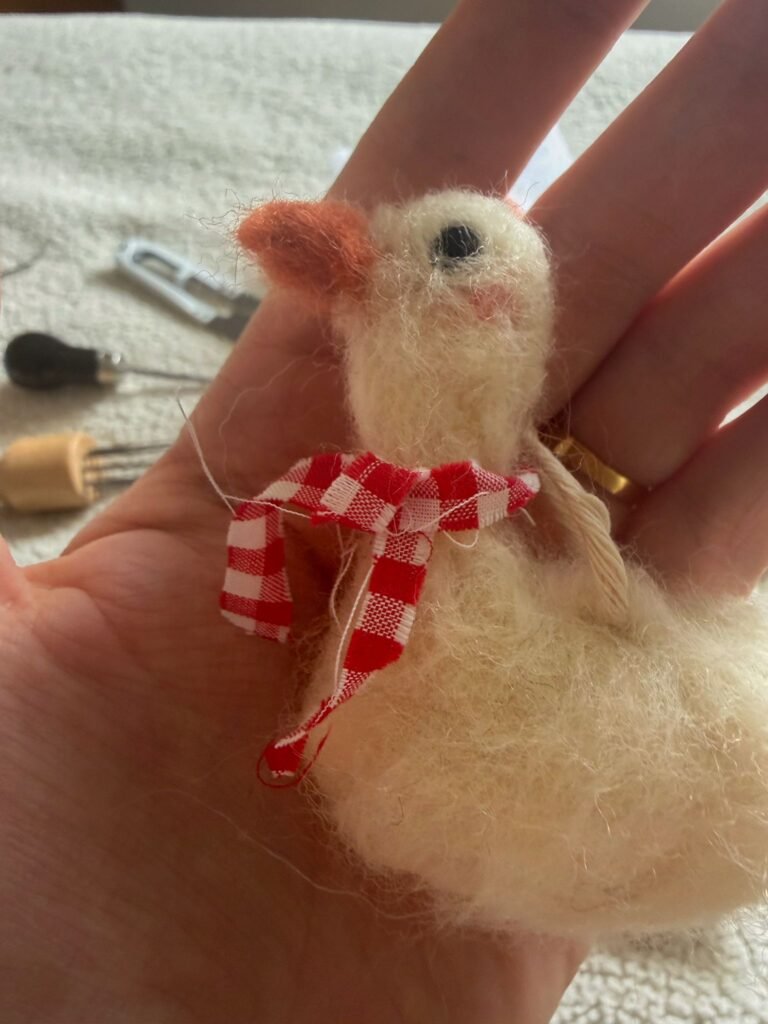
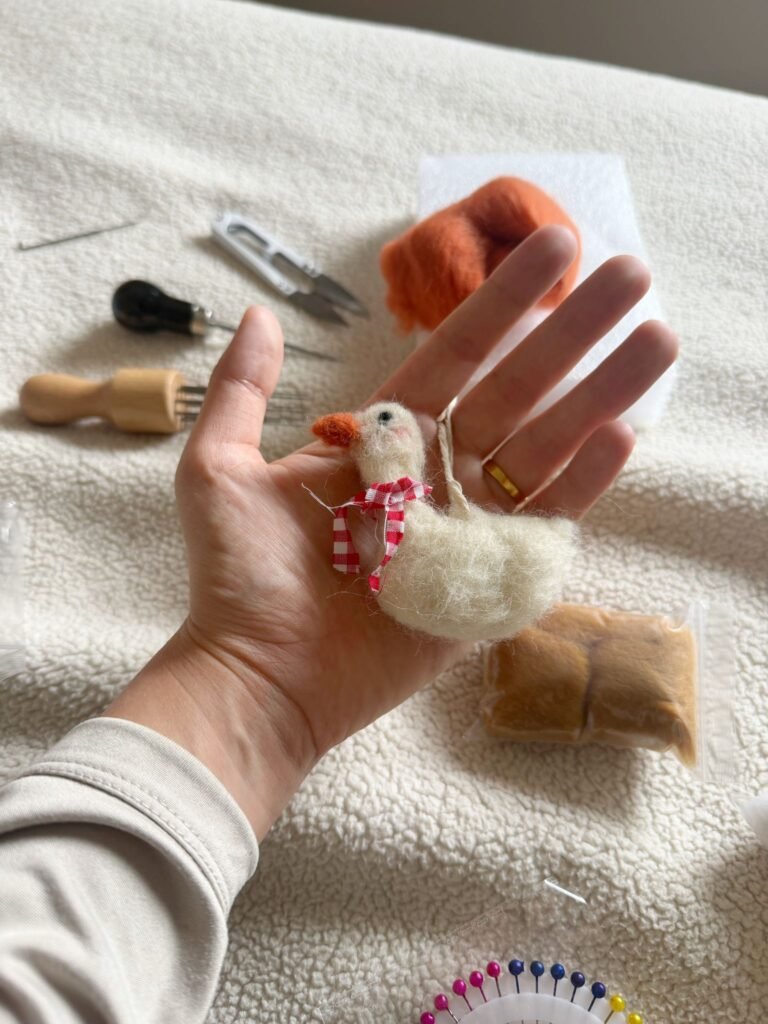
7. Adding Details Too Early
Eyes, noses, and other details can be added too soon and often distort and disappear
Avoid it by:
- Fully shaping and firming the base first
- Adding details only when the form holds its shape
8. Using One Needle for Everything
Different stages of felting need different needles.
Avoid it by:
- Using coarse needles (36–38 gauge) for shaping
- Switching to fine needles (40–42 gauge) for finishing and details
9. Over-Felting the Surface
Too much surface felting can make wool look shiny, flat, or lifeless.
Avoid it by:
- Stopping once fibres are secure
- Leaving a little softness for a natural look
10. Ignoring Finger Protection
Needle felting needles are sharp—and they hurt.
Avoid it by:
- Wearing leather finger guards or felting gloves. I wear one on my index and one on my thumb of my left hand.
- Keeping fingers well clear of the stabbing area
11. Using Too Much Wool at Once
Thick layers take longer to felt and often stay loose underneath.
Avoid it by:
- Adding wool in thin layers, and by thin, I mean shear, only a few fibers at a time,
- Felting each layer before adding more
12. Not Rotating Your Work
Felting one side too much leads to uneven shapes.
Avoid it by:
- Rotating your piece frequently
- Checking symmetry from all angles unless you do have a one sided project of course.
13. Expecting Perfection Immediately
Needle felting is slow by nature and suppose to be a relaxing hobby enjoyed at a slow pace. That is why hand felted ornaments cost so much, not because of material costs but time spent.
Avoid it by:
- Embracing the process
- Taking breaks if needed.
14. Skipping Reference Photos
Working from memory can throw proportions way off.
Avoid it by:
- Using reference images
- Checking shapes as you go
15. Giving Up Too Soon
Almost every needle felted piece looks awkward halfway through.
Avoid it by:
- Trusting the process
- Continue to refine, most projects come together at the end, and if they look a little wonky, I’m sure they are still lovable.

FAQ: Needle Felting Mistakes
What is the most common needle felting mistake?
The most common needle felting mistake is stabbing too hard or at an angle. This often leads to broken needles and uneven felting. Gentle, straight pokes create the best results.
Why does my needle felting look lumpy?
Lumpy needle felting usually happens when the core wool isn’t firm enough or when too much wool is added at once. Building shapes slowly and compacting the base thoroughly helps prevent this.
Can beginners use merino wool for needle felting?
Beginners can use merino wool, but it felts slowly and is best saved for surface layers. Using coarse core wool for the base makes needle felting much easier for beginners.
How do I stop breaking needle felting needles?
To avoid breaking needles, always stab straight in and out, use a felting mat, and avoid forcing the needle when working on small areas.
How long does needle felting take?
Needle felting takes time, especially for beginners. Most projects look messy halfway through, but patience and continued felting usually bring everything together at the end.
Final Thoughts
Needle felting is a craft that rewards patience, practice, and a gentle touch. Making mistakes is part of learning—but knowing what to avoid can save you time, wool, and sore fingers.
If you’re just starting out, take it slow, enjoy the process
Happy felting!
Other fun crafty posts, you make enjoy!
DIY Ghost Polymer Clay Candle Holder