Beginner Tutorial for How to Stitch a Hand Embroidery Heart
The Hand Embroidery Heart
In this beginner-friendly tutorial for how to stitch a hand embroidery heart, I will show you two basic stitches that are great for stitching a hand embroidery heart and can be diverse for any other shape you want. I chose hearts as I think they are sweet and look awesome to stitch on clothes for extra cute details.

What you need:
For this tutorial beginner tutorial on how to stitch a hand embroidery heart, you will need,
An embroidery hoop, the fabric of your choice, embroidery floss and needle, scissors, and pencil.
- Embroidery Hoop
- Fabric
- Embroidery Floss
- Needle
- Scissors
- Pencil
Set up:
Place the fabric in the embroidery hoop and tighten it. To draw the hearts you can get a template online or you can freehand. In this tutorial I freehanded it.
Draw your hearts and after that cut a decent amount of embroidery floss. The length of the thread depends on the size you want your hand embroidery heart or shape to be. Thread your needle For this tutorial, I used the full six strands of floss. Don’t be afraid to try different numbers of strands. We are now ready to begin making the hand embroidery heart.
- Make your fabric taut in the embroidery hoop
- Draw you pattern
- Get your needle and floss ready
French Knot Hand Embroidery Heart:
The French knot is one of the most common embroidery stitches, however, it can take a little practice. Try again if you can’t get it the correct way the first time. It’s very simple to undo and start again.
I have a full tutorial on How To Make The Perfect French Knot in Seconds if you are struggling to make this stitch,
- Firstly bring the needle up through the back of the fabric.
- Wrap the thread around the needle two to three times.
- Push the needle back through where it originally came from.
- Hold and pull slightly the slack of the thread to tighten it.
- Push the needle right through to the back and you should be left with a cute little knot.
Repeat the previous stitch until the entire heart or shape is completed.


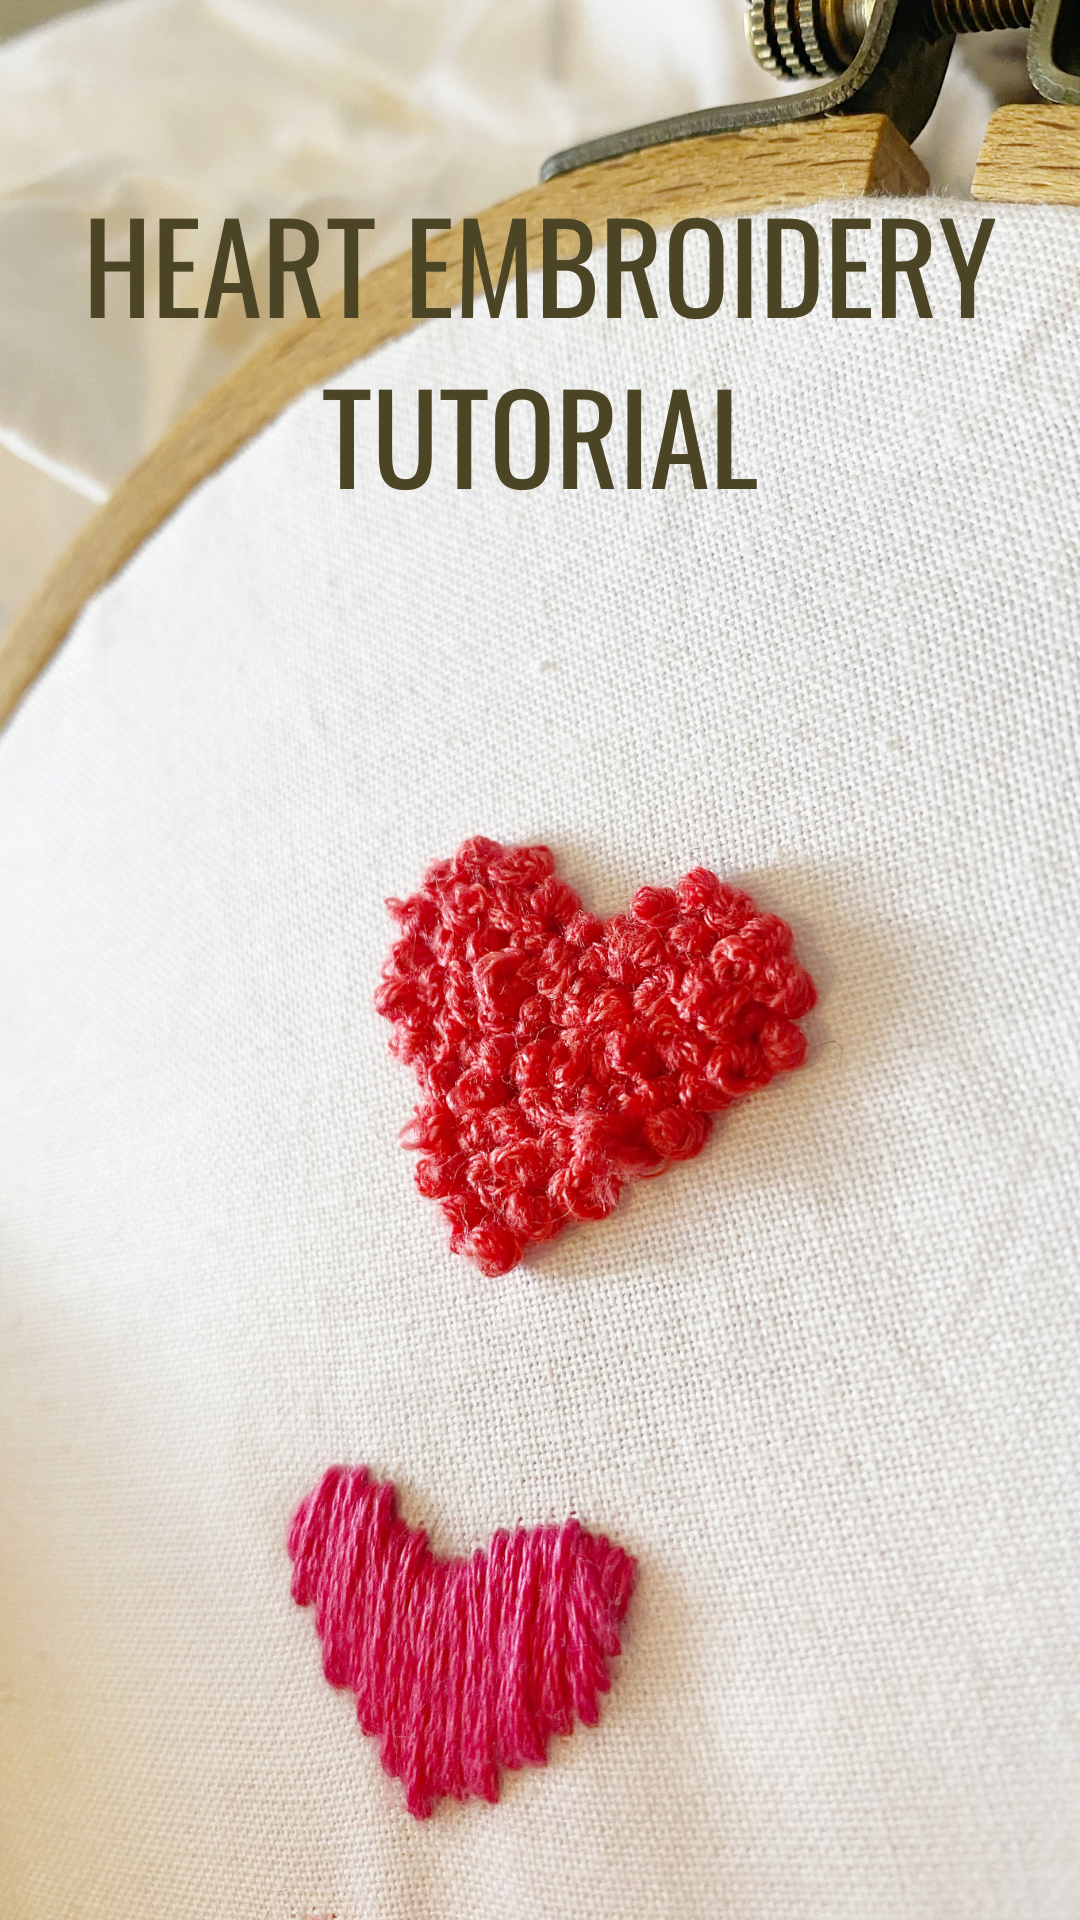
Your completed hand embroidery heart should look similar to this.
Satin Stitch Hand Embroidery Heart:
This next stitch is very common as well. This stitch is mainly used to create a solid shape in embroidery. This stitch is extremely easy and doesn’t take much time at all
- For this stitch, I like to draw guidelines. Since the satin stitch is just straight lines it’s important not to go crooked.
- At your chosen starting point at one of the edges, bring your floss and needle up from the back.
- then insert the needle back into the fabric on the other side of the shape or heat making a straight line.
- It is important to make sure your line is straight and not diagonal because statin stitches should be straight up and down. This is why it’s recommended to draw guidelines before you start.
- Now repeat this process until the shape is complete. Be sure to follow the outline tightly to ensure accuracy.
In the end, your finished design should be solid and completely filled.


Your completed hand embroidery hearts should look similar to this.
Tips on Hand Embroidery For Beginners
Use the Right type of fabric
Using the right type of fabric is vital if you want to pull off great embroidery art. Many people think you can embroider on any fabric, and while this is true you can, some fabrics are a better fit to hand embroider on than others. Cotton and linen are great for hand embroidery whereas satin and thinner fabrics are not.
Use the right needle
A good needle that matches your fabric type can make the world of difference. For a beginner, I recommend a sharp thinner needle with a large eyehole. If the needle is too big it will leave holes and if the needle is too small the fabric will pull as you try to force it through.
Placing the Fabric in the Hoop
When you put the fabric in the embroidery hoop, it is important to make sure it isn’t overstretched or under stretched because If over/under stretched the fabric will pucker and ruin your design. Make sure the fabric is stretched just right. This depends on your fabric type first, but a good method to go by is the fabric should make a very soft drumming sound when you tap a finger against it. Remember don’t leave your embroidery work in the hoop when you finish for the day, this can ruin the fabric too.
I recommend you read my blog post on hand embroidery mistakes. You can find a full list of Avoid These 10 Common Beginner Mistakes in Hand Embroidery here for tips to making your embroidery amazing.
I hope this tutorial has been helpful, remember these stitches are diverse and can be used for almost anything. I would love to see your hand embroidery hearts.