HOW TO: Leaf Stitch Hand Embroidery Tutorial | Fishbone Leaf Stitch
Fishbone Leaf Stitch Tutorial for Beginners
Learn the fishbone leaf stitch with this leaf stitch hand embroidery tutorial. Hand Embroidery leaves are gorgeous and are one of the most common things stitched in hand embroidery. There are many different types of hand embroidery leaves. I will be showing you the most simple and fastest hand embroidery leaf. This is my go-to way to stitch a leaf. The technical term for this stitch is called the fishbone stitch. It is very quick and simple but really adds the next level of detail to any hand embroidery project.

What is the FishBone Stitch
This leaf stitch is called a fishbone stitch, or the fishbone leaf stitch. It is called this name due to it looking like a fishbone. While it looks complex and not beginner friendly, this stitch is actually the opposite of that. This fishbone leaf stitch is completely perfect for beginners in fact it is one of the first stitches you should be learning that’s how easy it is!
Hand Embroidery Leaf Tutorial | Fishbone Embroidery Stitch Tutorial
This is a step-by-step tutorial with pictures of how to make a hand embroidery leaf. For this tutorial, I am using all six strands of embroidery floss. For beginners, I recommend using 6 strands of embroidery floss, as it is easier to use and easier to undo mistakes.
Step 1 – Draw your Hand Embroidery Leaf Pattern
Draw your hand embroidery leaf design ( you can use pencil but pens for embroidery are available, I will link some great beginner embroidery items at the end of this tutorial)
- Simply draw an outline of a leaf
- Draw a line through the middle.
This is just a simple quite rough pattern just to use as a guide.
Step 2 Make the Base
- Starting at the tip or top of the leaf, pull your embroidery floss up through the back of the fabric
- push it back through at the bottom of the leaf.
You should have an embroidered line right through the middle where we originally drew it with the marker.


Step 3 Start filling it in
- Slightly to the side of the top of the leaf bring your needle through.
- Make a diagonal line crossing over the centerline but only slightly and just bring the needle down to around the middle of the centerline and push the needle through
- Repeat on the other side, making a mirror image of the other side.


Let’s start Step 4 Repeat the process
- Repeat this process.
- Follow the outline you drew.
- Every time you bring the needle to the centerline bring it a little bit lower eventually reaching the bottom of the leaf.


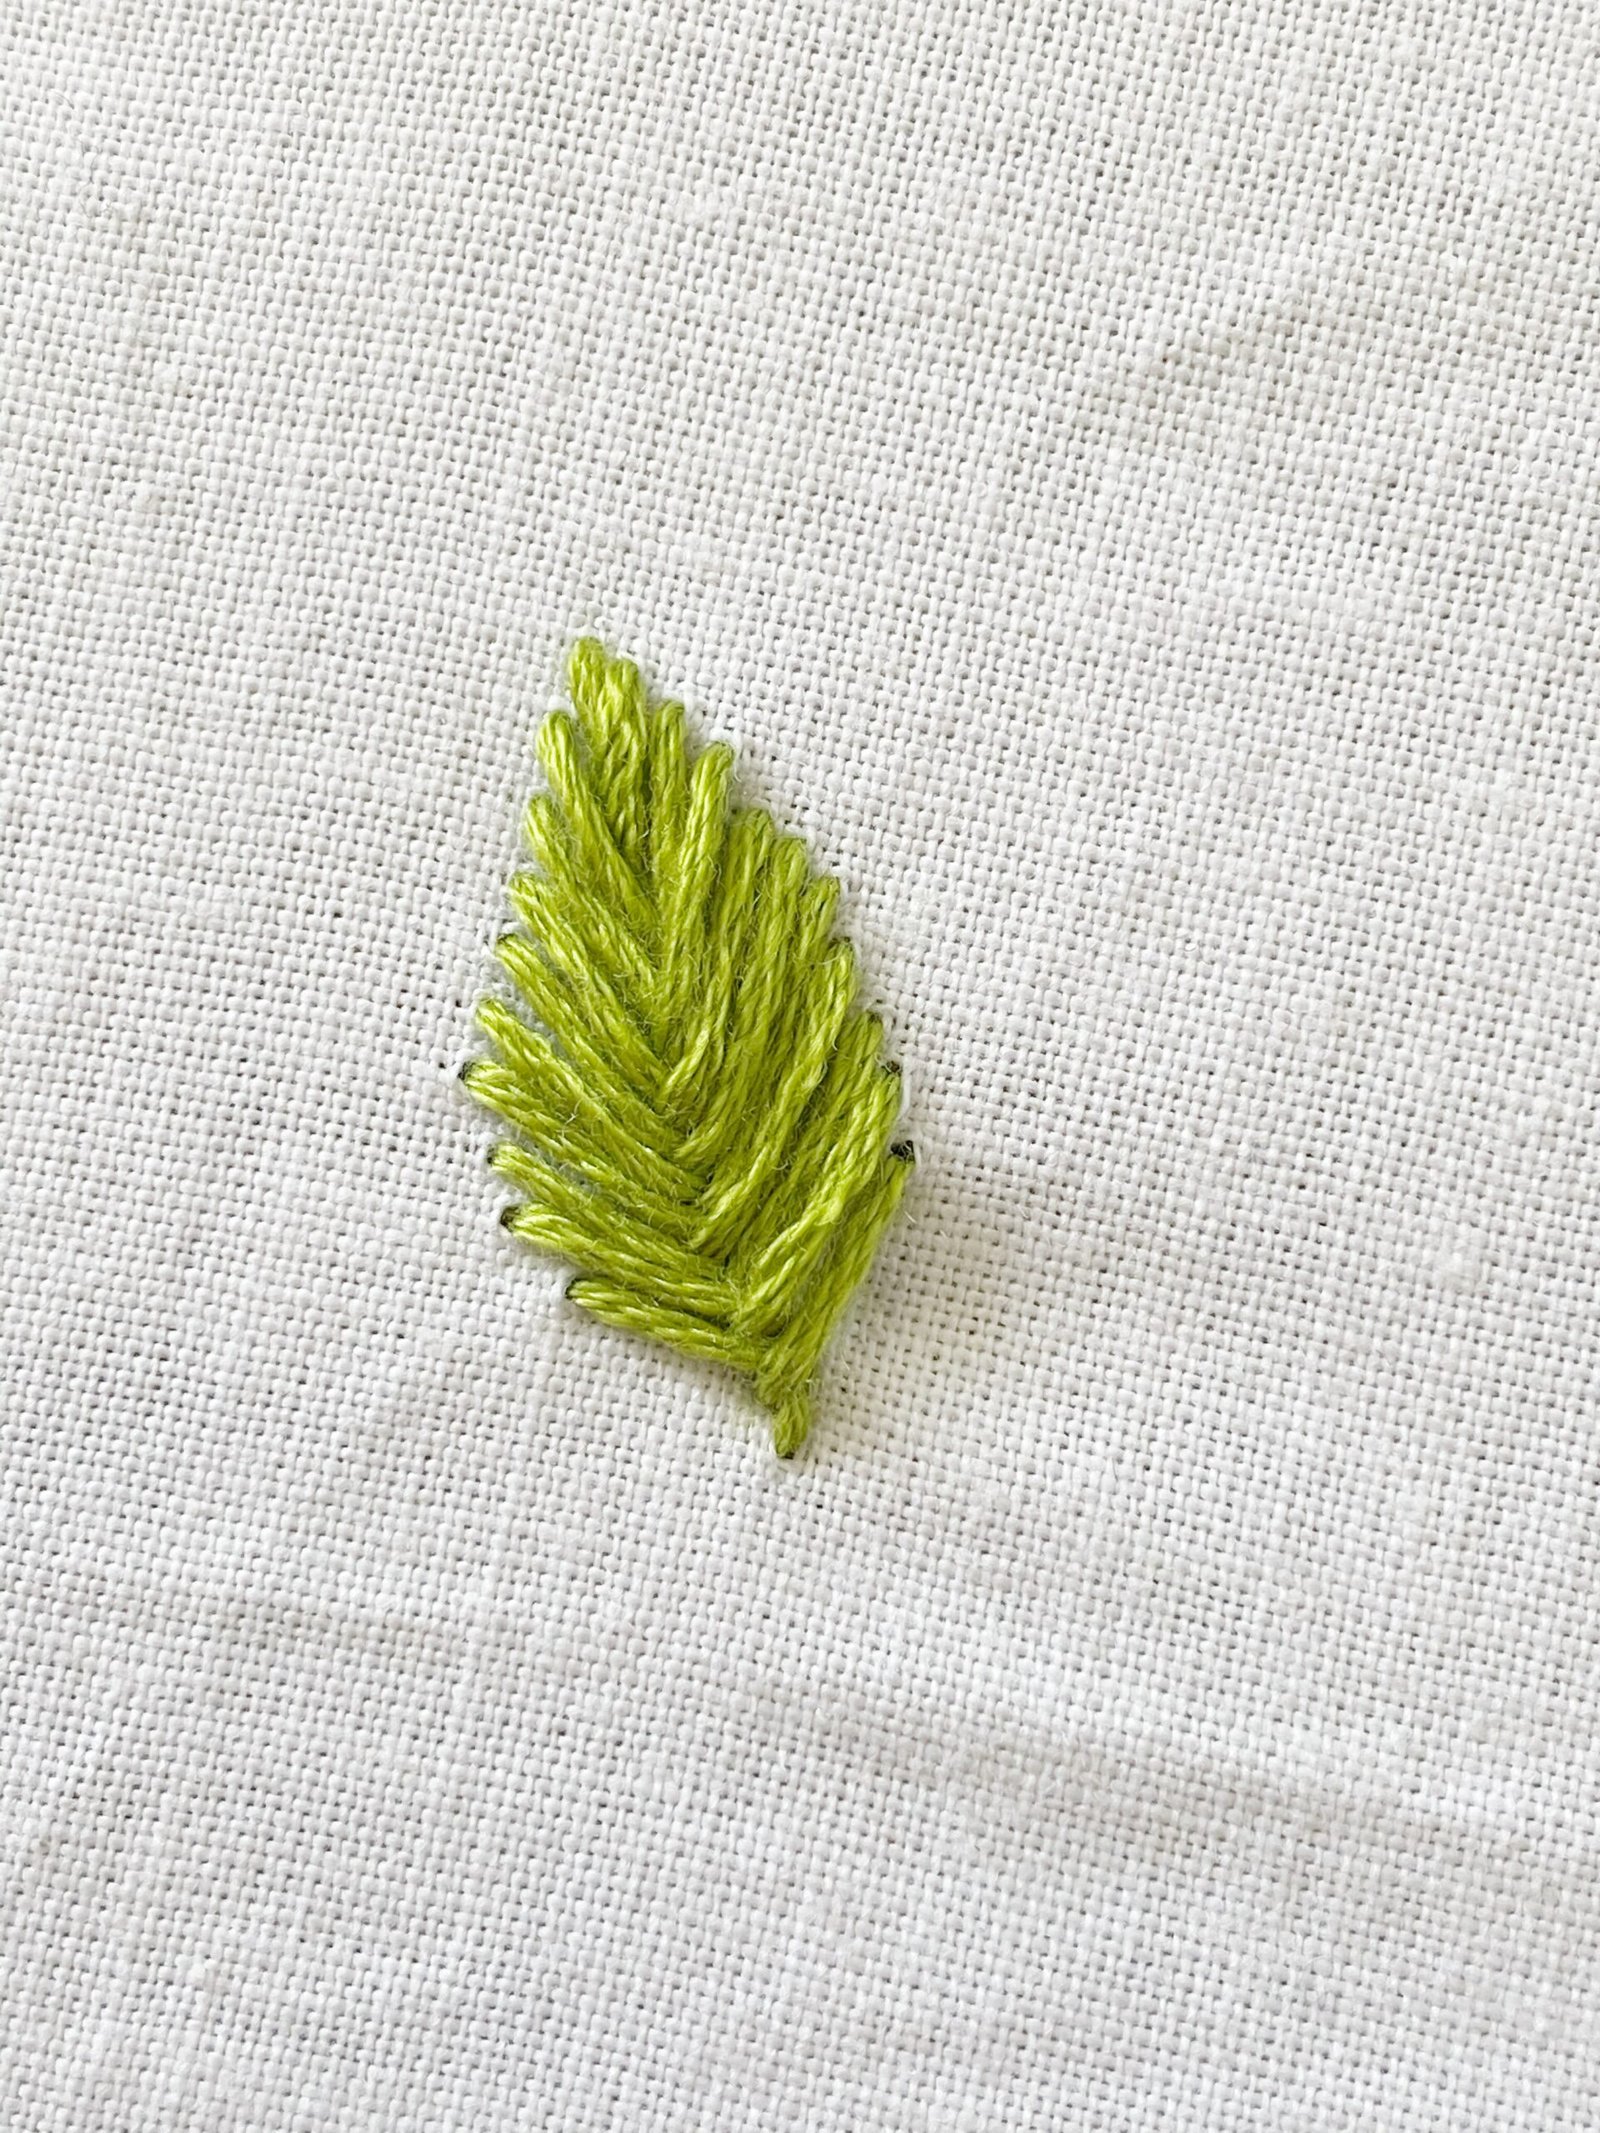
Step 5 – Hand Embroidery Leaf is Complete!
- Finish the leaf
- tie off the floss at back
You should have now just finished the embroidery leaf. With this hand fishbone stitch you can make the leaf how big or small you like. It is completely up to you. It is even possible to use different colors, doing this will definitely add so much more depth to any hand embroidery art piece.
What about the Embroidery Rose in the Picture?!
The rose you see next to the fishbone leaf stitch we just completed is a wagon wheel rose. If you are interested in learning how to make this rose, I have a full step-by-step tutorial with pictures that is perfect for beginners.


Tips for Beginner Embroiderers
- Make sure your plan your color scheme beforehand
- Use the right type of needle
- Use the right fabric
- Practice makes perfect
If you are looking to avoid those beginner embroidery mistakes, check out this article so you can be a pro in no time.
Avoid These 10 Common Beginner Mistakes in Hand Embroidery
That’s all for this embroidery tutorial…
I hope this leaf stitch embroidery tutorial has given you some sort of direction for how to simply stitch a hand embroidery leaf. There are a lot of different methods but this one is perfect for beginners.