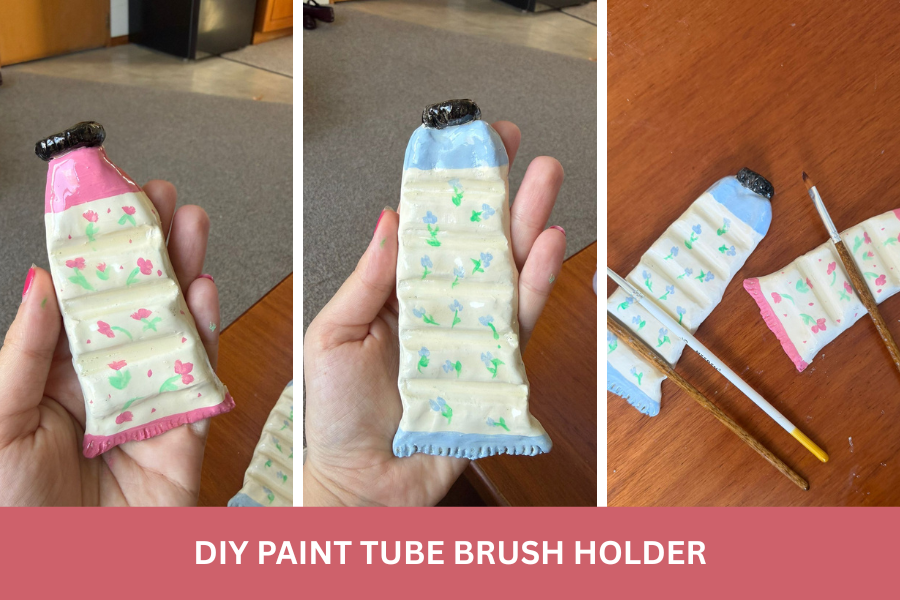
DIY Air Dry Clay Paint Brush Holders Tutorial
Looking for a cute and practical craft for your art desk? This DIY air dry clay DIY paint brush holder is such a fun project to make! They’re perfect for holding paint brushes while you paint, and they also look super adorable sitting on your craft table or shelves. This craft only needs clay and paint, it’s beginner friendly and easy to customize. Let’s get started.
What’s Good About This Craft…
- Easy beginner clay project
- Functional and decorative
- Great handmade gift idea
- Customizable colors and designs
- Perfect for organizing your painting supplies
Supplies You’ll Need
- Air dry clay
- Acrylic paint
- Paint brushes
- Clay tools or a butter knife
- Rolling pin (or smooth bottle or a glass)
- Water for smoothing
- Clear gloss varnish or Mod Podge (optional)
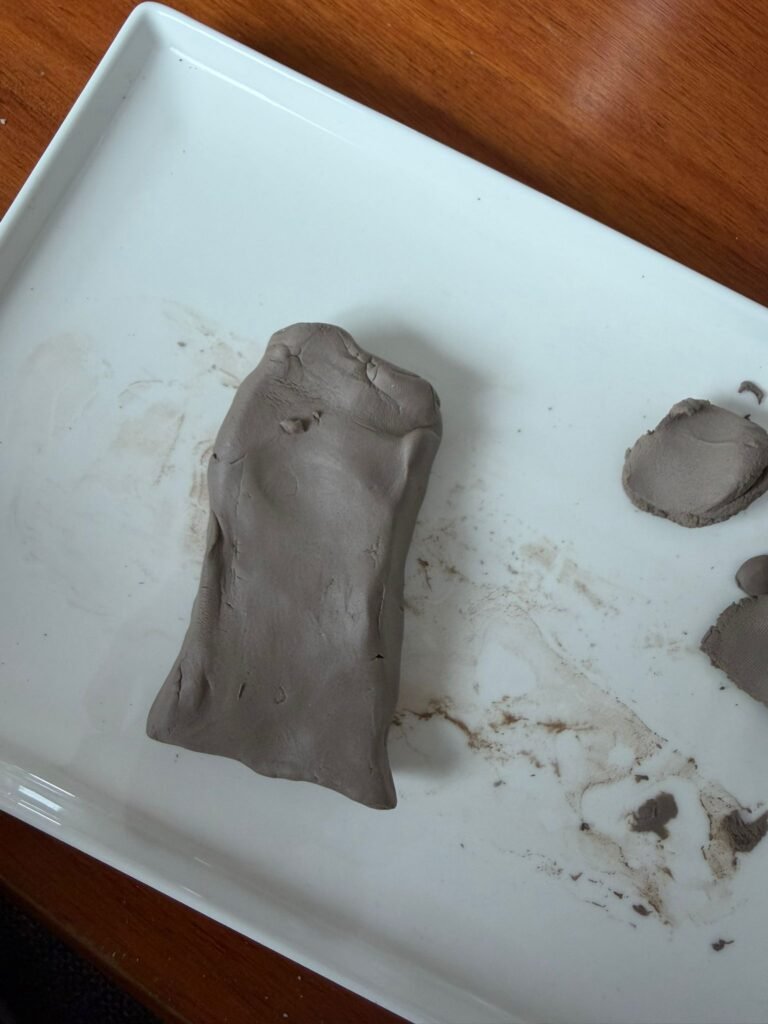
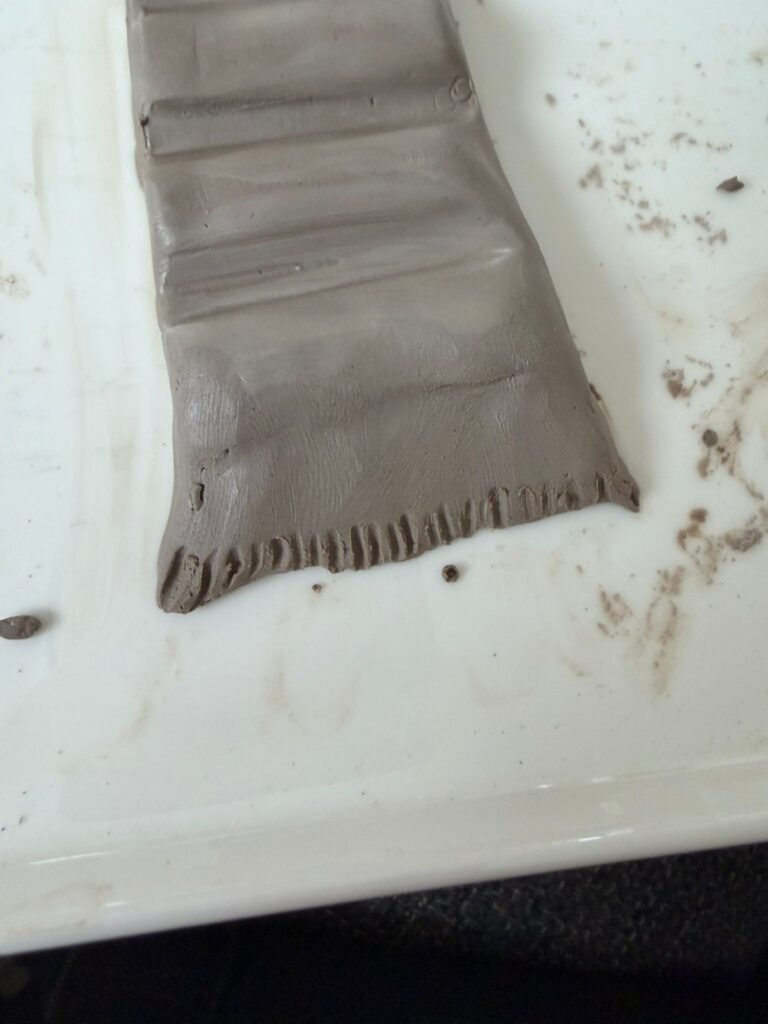
Step 1: Shape the Paint Tube
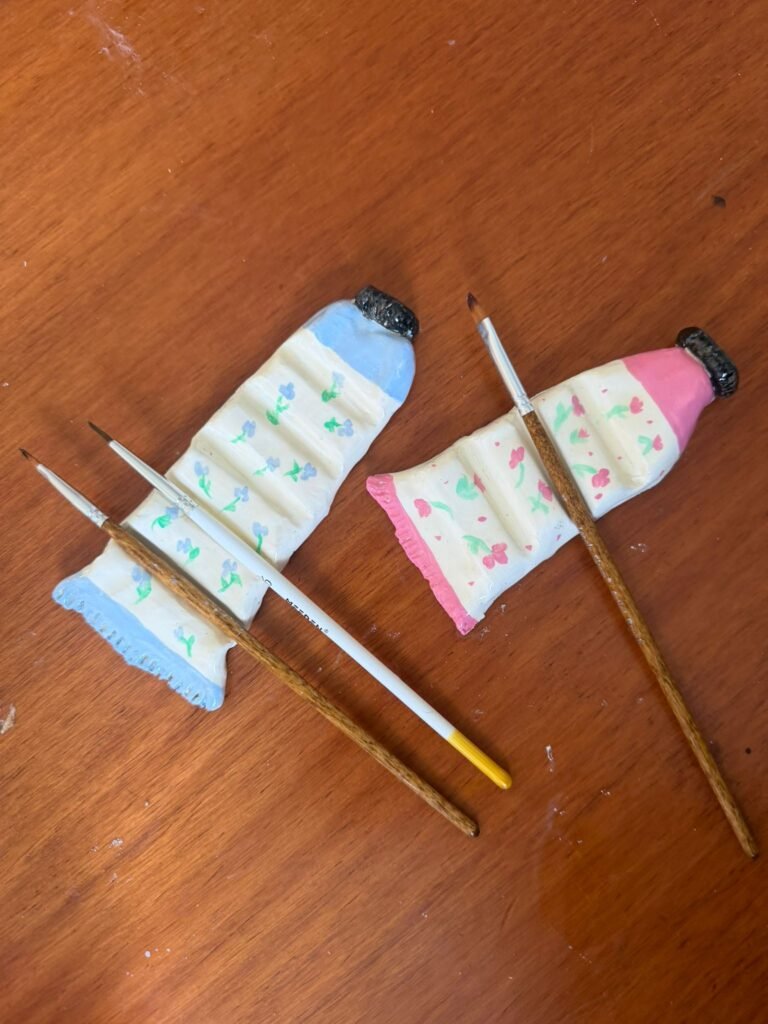
Start by taking a chunk of air dry clay and shaping it into a tube shape, similar to a squeezed paint tube or something like a toothpaste tube
Flatten the body slightly and pinch the end where the “cap” will go. I added lots of little dents and folds to make it look more realistic and crinkled like a used paint tube.
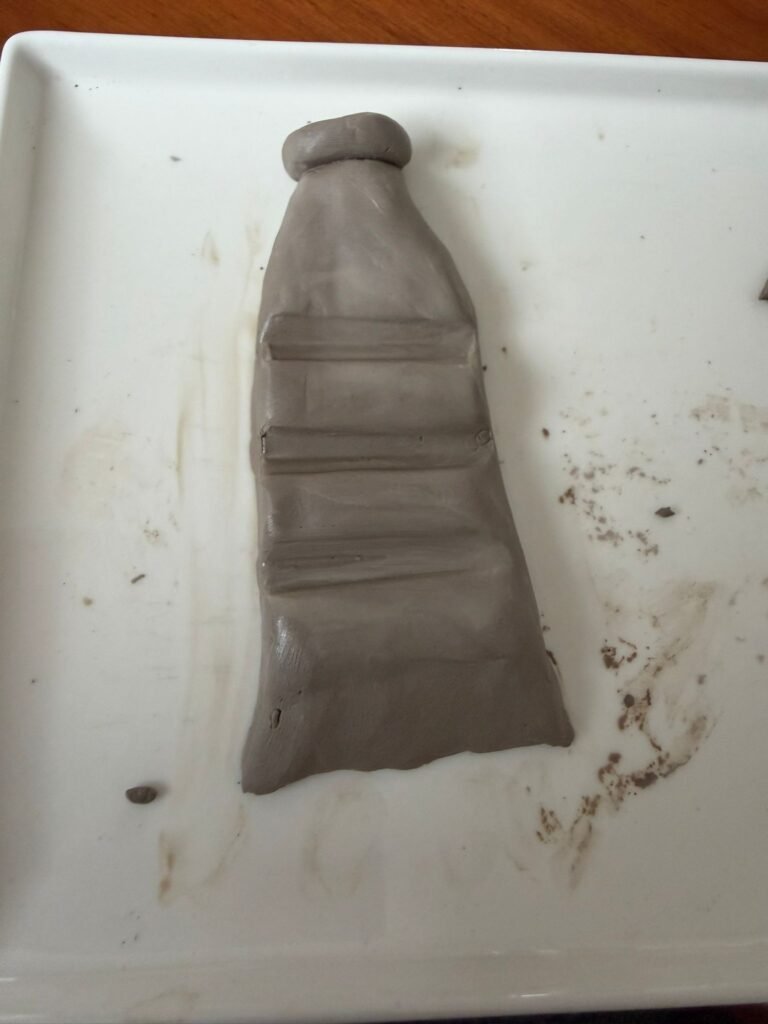
For the bottom edge, gently press lines into the clay using a knife or sculpting tool to imitate the sealed edge of a paint tube.
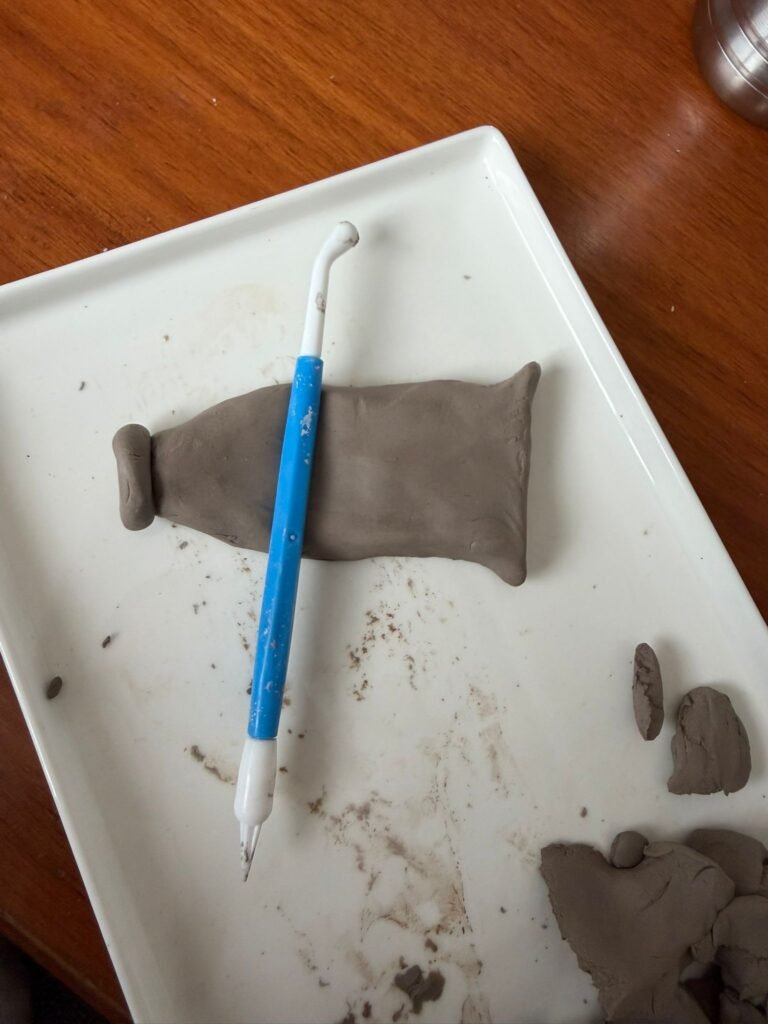
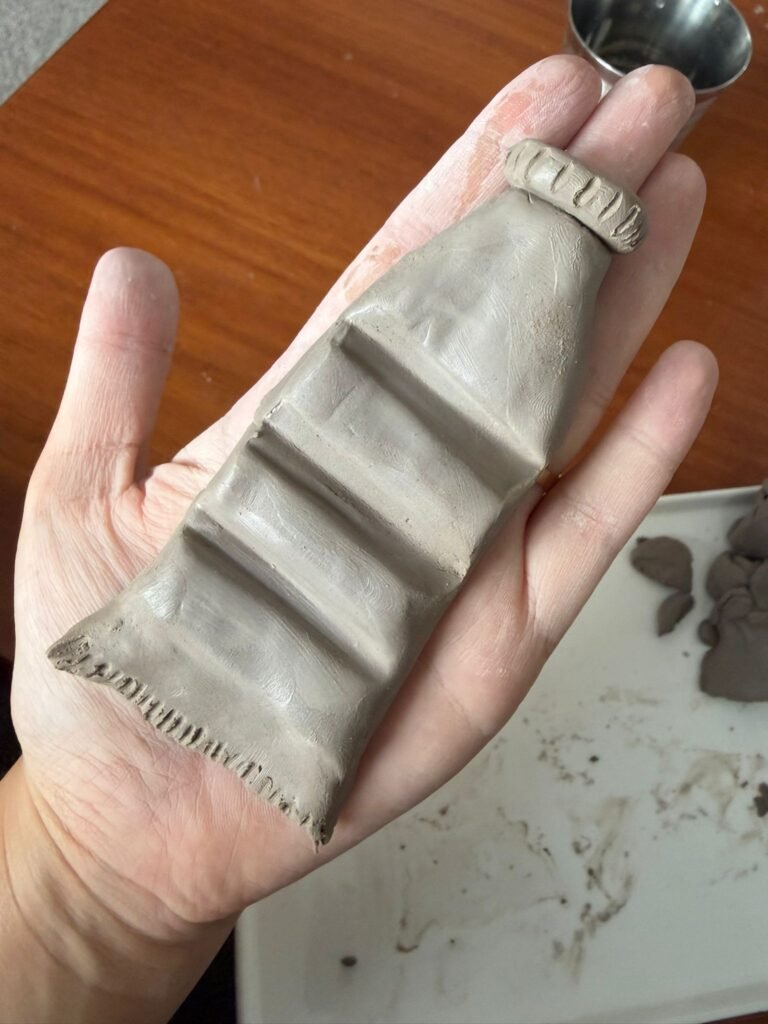
Step 2: Create the Brush Holder Groove
Before the clay dries, place a paint brush gently across the top section of the tube and press lightly to create a resting groove.
Make sure the groove is deep enough to hold the brush securely but not so deep that it weakens the clay. Very thin clay will crack as it dries
Step 3: Add the Cap Details
Roll a small cylinder of clay for the cap and attach it to the end using a little water.
Add texture lines around the cap to mimic the ridges on a real paint tube lid.
Step 4: Let the Clay Dry
Allow your paint brush holder to dry completely, usually takes 24 hours.

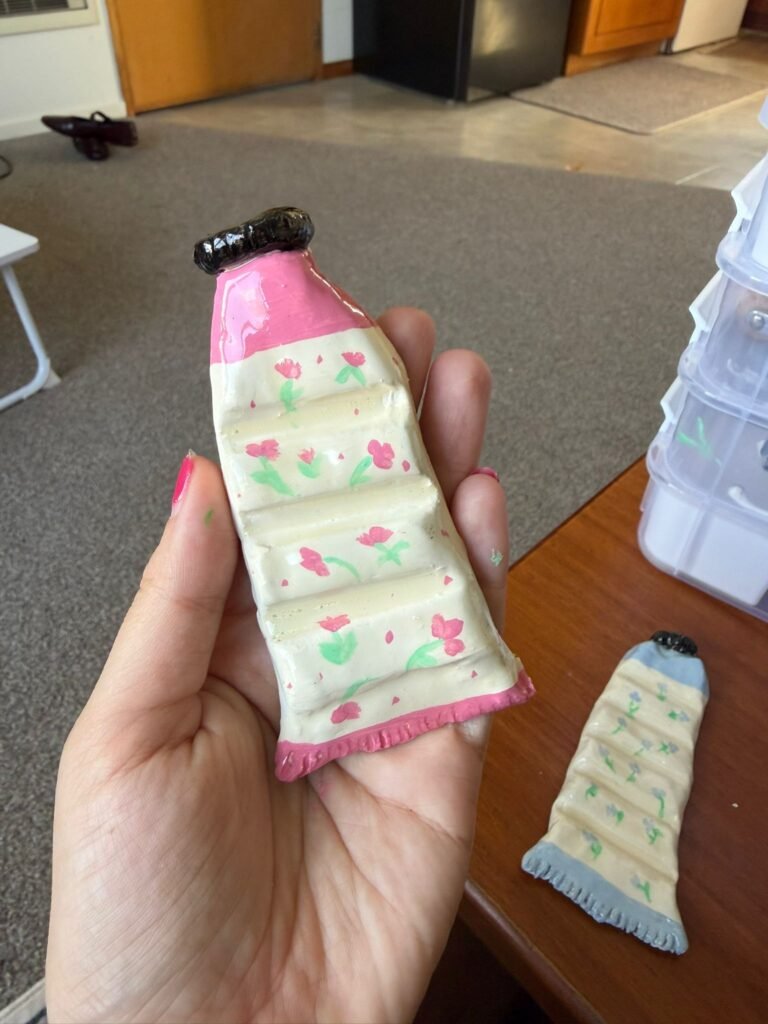
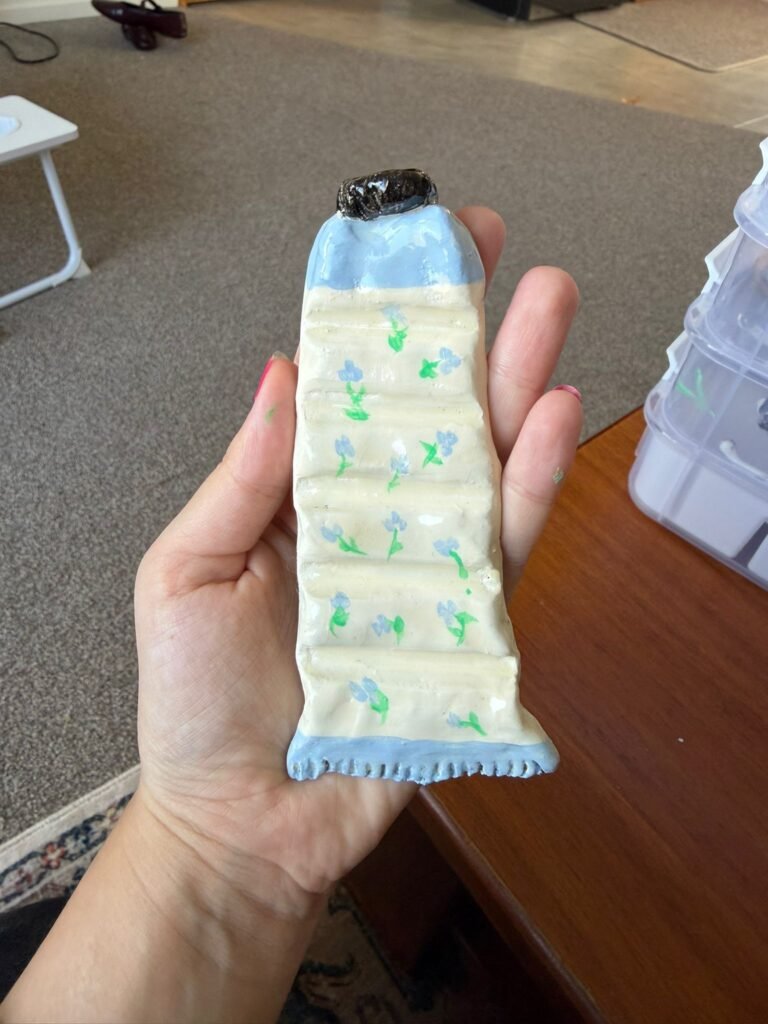
Step 5: Paint Your Design
Once dry, paint the holders with acrylic paint.
I used pastel pink and pastel blue accents, then added tiny floral details. You could totally do a decoupage version too. Details here on decoupage….How To Decoupage Shells with Napkins |easy & cheap DIY
Step 6: Seal the Holder
To protect the paint and give it a glossy ceramic-style finish, seal the piece with a clear varnish or Mod Podge once the paint is fully dry….. So I actually used Gel Topcoat Nail polish and set it with a UV lamp. It makes it super glossy and more durable I find
This step is optional, but it makes the holder more durable and gives it a finished glossy look.
Finished Result
Your finished paint brush holder is both cute and useful!
Tips for Using Airdry Clay
- Keep your clay slightly thick so it doesn’t crack
- Smooth cracks with a little water before drying
- Don’t make the brush groove too thin
- Let the paint dry fully before sealing
- Store unused air dry clay in an airtight container
Final Thoughts
This air dry clay DIY paint brush holder is such a fun and easy craft to make. I love how they look on my desk. They actually look way harder to make than they really are, and the glossy top coat really finishes it off and makes it look so much more expensive than it really is.
If you are making your own version, remember to experiment with different colors, sizes and patterns and most importantly have fun with it.