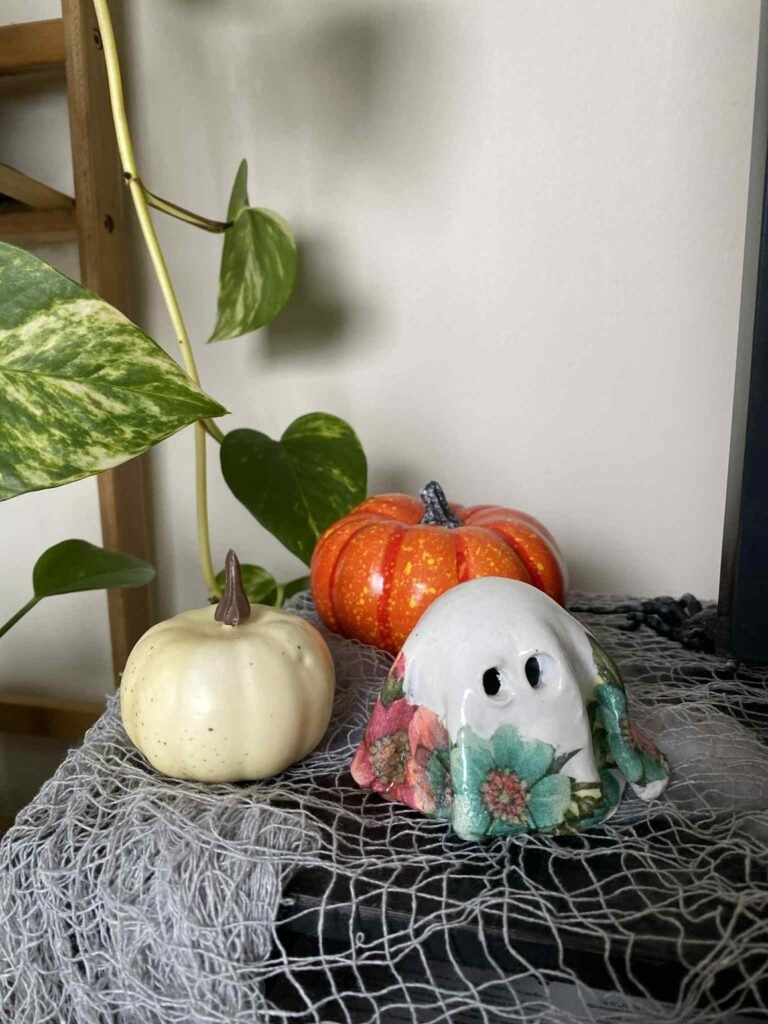
If you’ve been scrolling through Pinterest or TikTok lately, you’ve probably seen the viral DIY decoupage clay ghost. They’re soft, glowy, and covered in pretty vintage napkin prints — basically the perfect Halloween DIY.
When I tried making one, I quickly learned two things: (1) finding the “perfect” napkins is harder than it looks, and (2) sometimes the DIY version ends up cuter when you make it your own. My little floral ghost might not be Pinterest-perfect, but when the tea light goes in, it glows beautifully — and that’s what really matters.
If you want to try this Halloween craft yourself, here’s exactly how I made my DIY decoupage clay ghost.
What You’ll Need
- Air-dry clay
- Napkins (floral, patterned, or whatever you can find)
- Mod Podge
- Small paintbrush
- White acrylic paint
- Tea light candle
- Ping pong ball + empty bottle (to use as a mold)
How to Make a DIY Decoupage Clay Ghost
If you want a quick thirty second video on how to make this, i posted one on my instagram, check it out here:
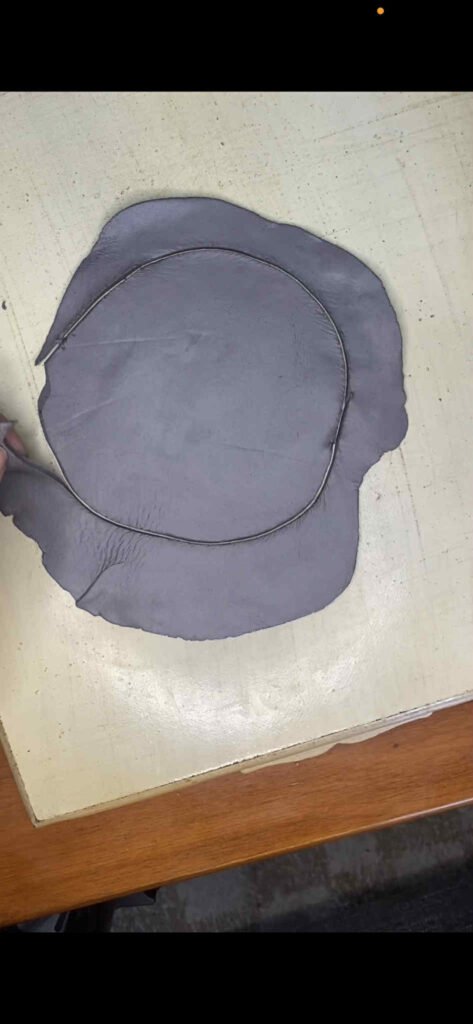
- Shape the Base
- Roll out your air-dry clay (a glass works fine if you don’t have a rolling pin).
- Cut out a rough circle — no need for perfection.
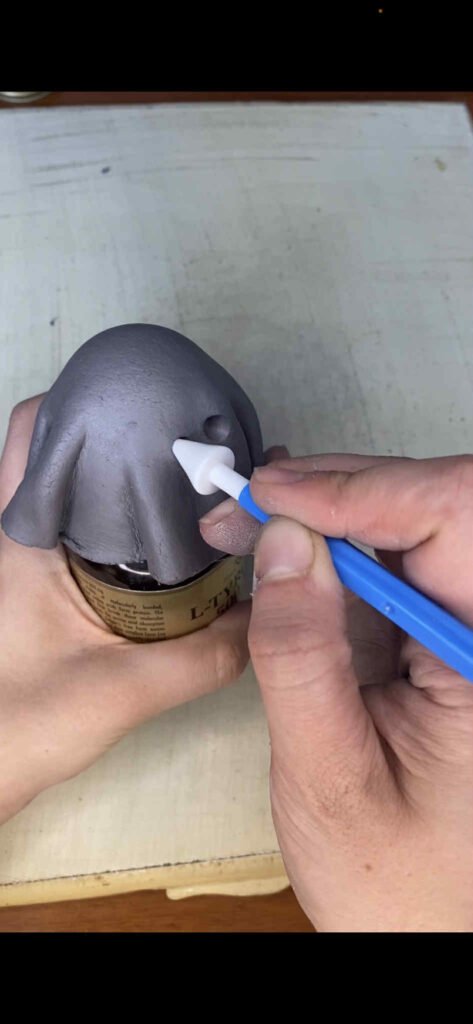
- Create a Mold
- Balance a ping pong ball on top of an empty bottle.
- Drape your clay circle over it so it looks like a little sheet ghost.
- Pinch and fold the edges to make soft, fabric-like pleats.
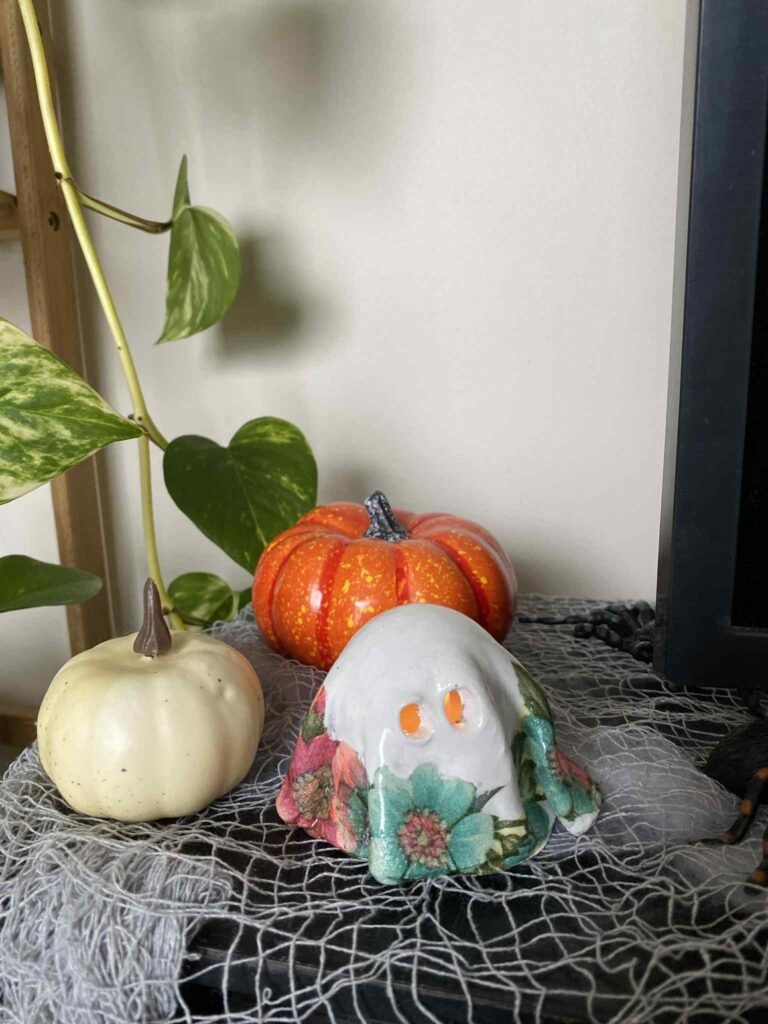
- Add the Face
- Cut out two small eyes for that classic ghost look.
- Smooth the edges with a damp fingertip.
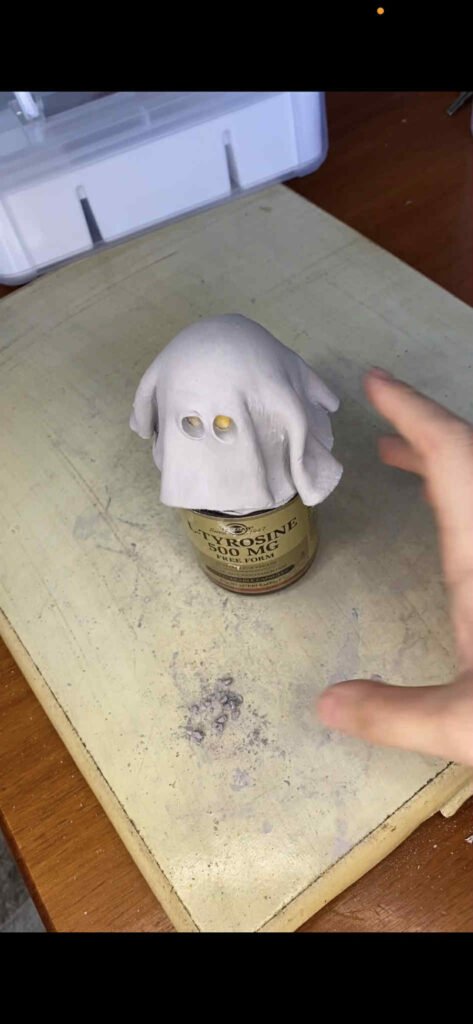
- Dry and Remove
- Leave the clay to dry completely, (24hrs usually) then gently lift it off the mold.
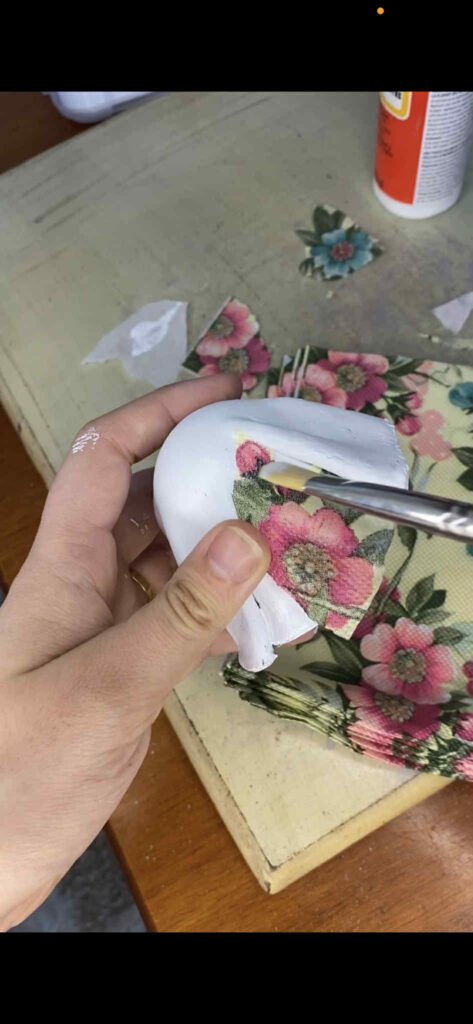
- Decoupage Time – TUTORIAL HERE
- Peel off the top patterned layer of your napkin.
- Brush a thin coat of Mod Podge on the ghost and carefully press napkin pieces down.
- Work in small sections to avoid wrinkles.
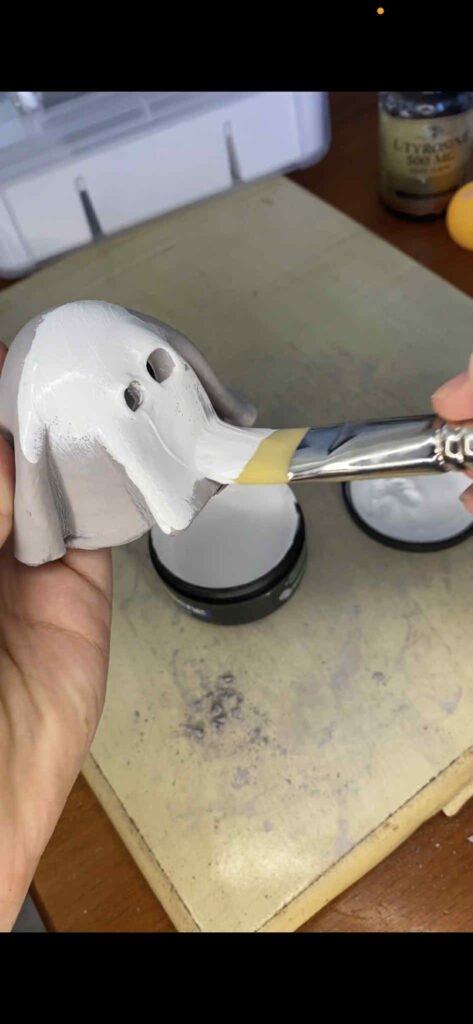
- Softening the Design
- If your pattern looks too bright (like my pink-and-turquoise flowers), lightly brush over with white paint.
- This fades the design and gives a more ghostly, vintage look.
- Finishing Touches
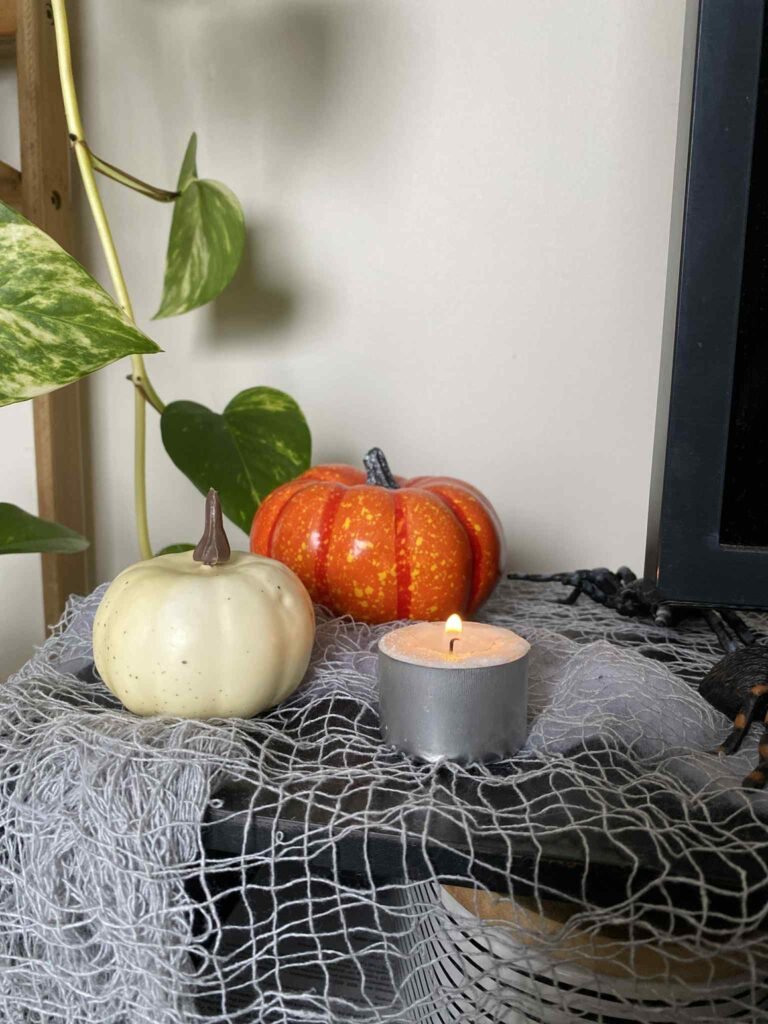
- Pop a tea light underneath and watch it glow. LED candles work great too!

Watch My Mini Decoupage Ghost in Action
If you want to see this little ghost come to life, check out my YouTube Short! It’s just 40 seconds, showing the whole process from clay to decoupage to end result.
Click to Watch
Also watch my ghost on TikTok or Instagram.
My Tips for Success on Making The DIY Decoupage Clay Ghost
- Muted napkins give the most vintage look, but don’t be afraid to improvise.
- Mini ghosts are perfect for small spaces and use less clay. Clay isnt cheap where i’m located
- The glow from the tea light hides any little imperfections.
Final Thoughts
This DIY decoupage ghost might not look exactly like the viral versions online, but that’s the fun of crafting.
So don’t stress about making it “perfect.” Grab some clay, whatever napkins you can find, and give it a go. Your ghost will be unique, and that’s exactly what makes handmade crafts special.
Happy haunting, and Happy Halloween 👻