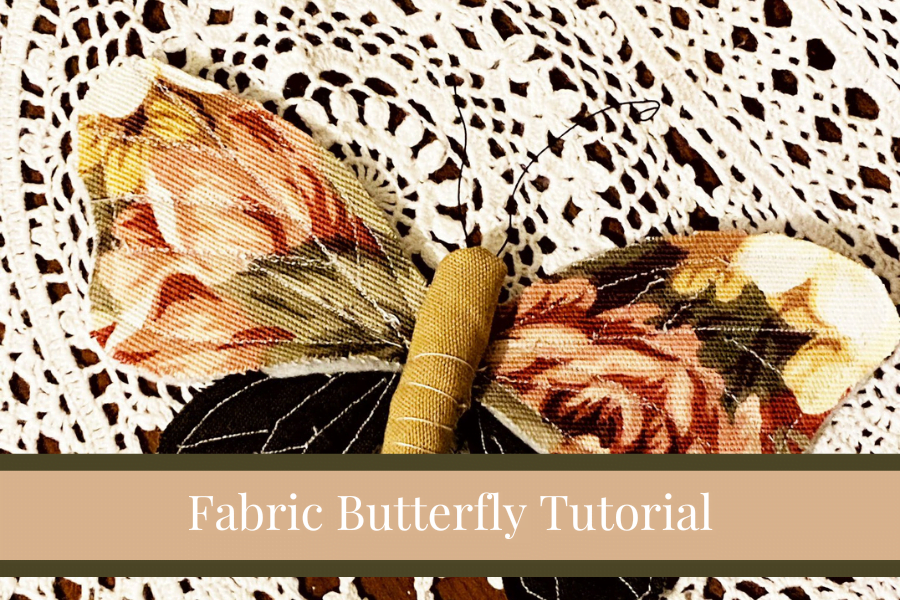
How to Make a Fabric Butterfly | Free Pattern | Small Sewing Project for Beginners
Let’s make this fabric butterfly. This is a small sewing project that is perfect for people learning to sew. In this tutorial, I will give you a free sewing pattern that can be downloaded and printed. However, this pattern can totally be drawn free-handed.
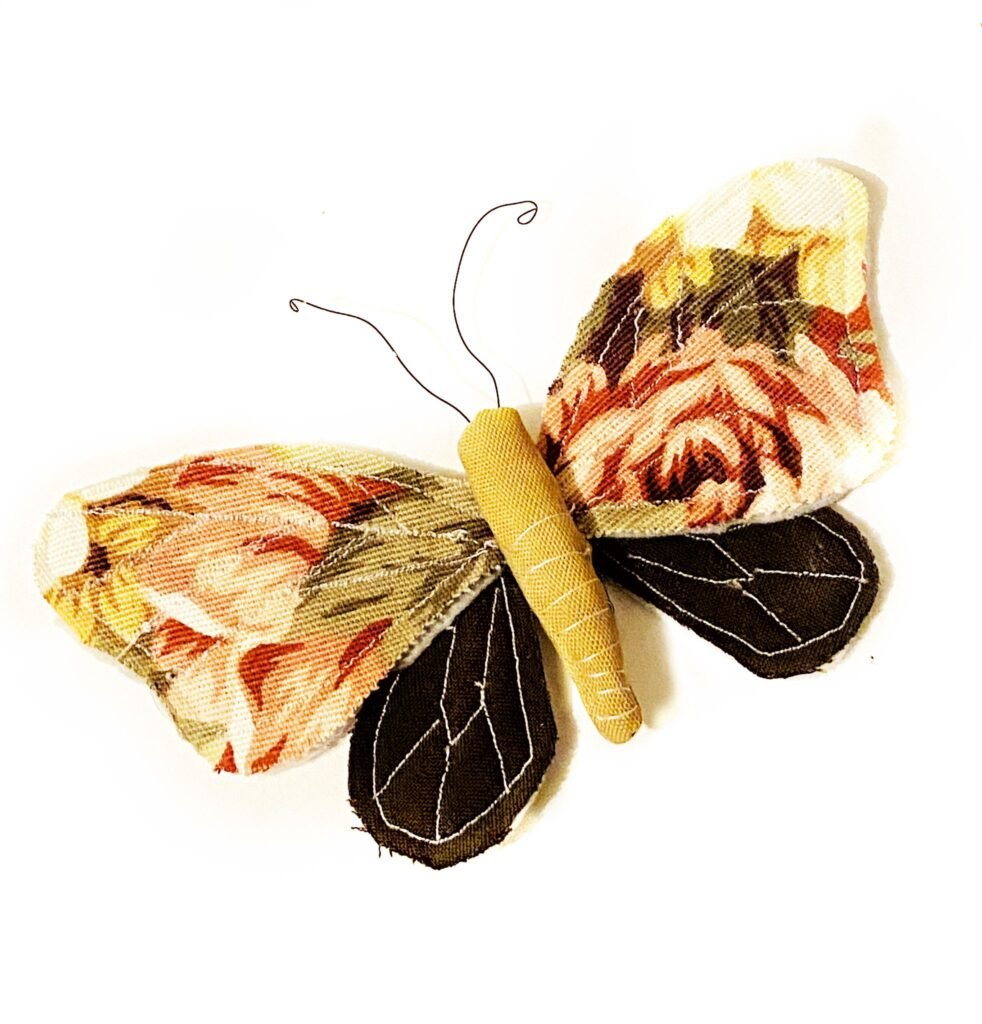
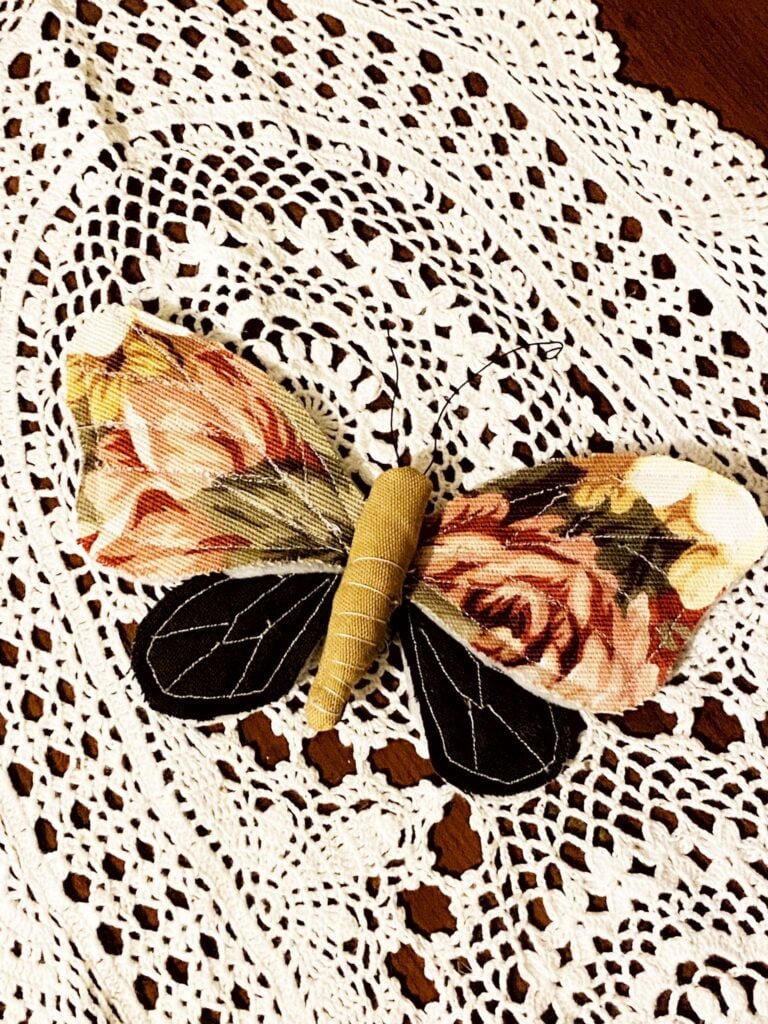
Fabric Butterfly
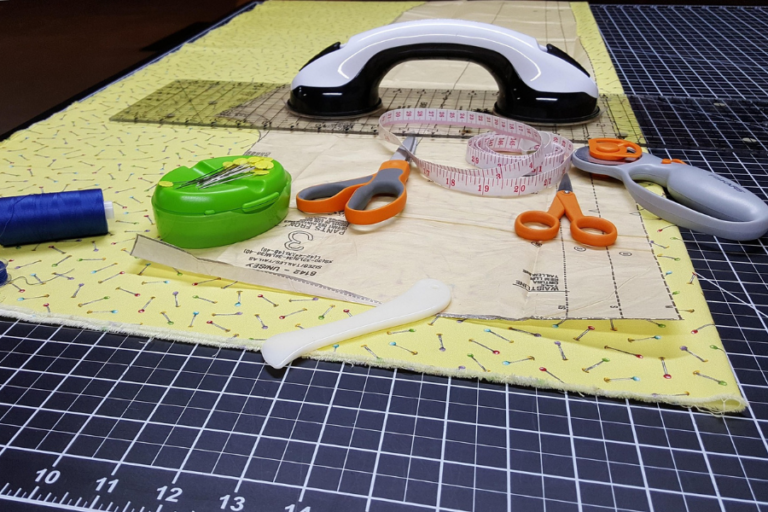
This fabric butterfly can be hand-sewn or made with a machine. For this tutorial, I have used my sewing machine. Let’s go over with something you need. Also, I made this one into a brooch by adding a safety pin. This is optional but I think adding a safety pin makes it easy to attach the finished butterfly to clothing, bags, etc.
What you need:
- Felt
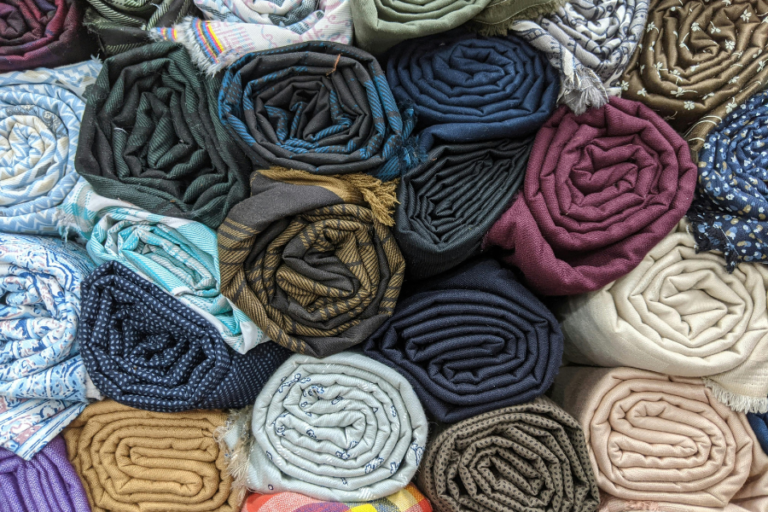
- Fabric ( 3 different colors/patterns)
- Free Butterfly Sewing Pattern
- Stuffing
- Craft wire
- Needle and Thread
- Safety pin (optional)
- sewing machine (optional)
Tutorial
Print the Pattern or Make your Own
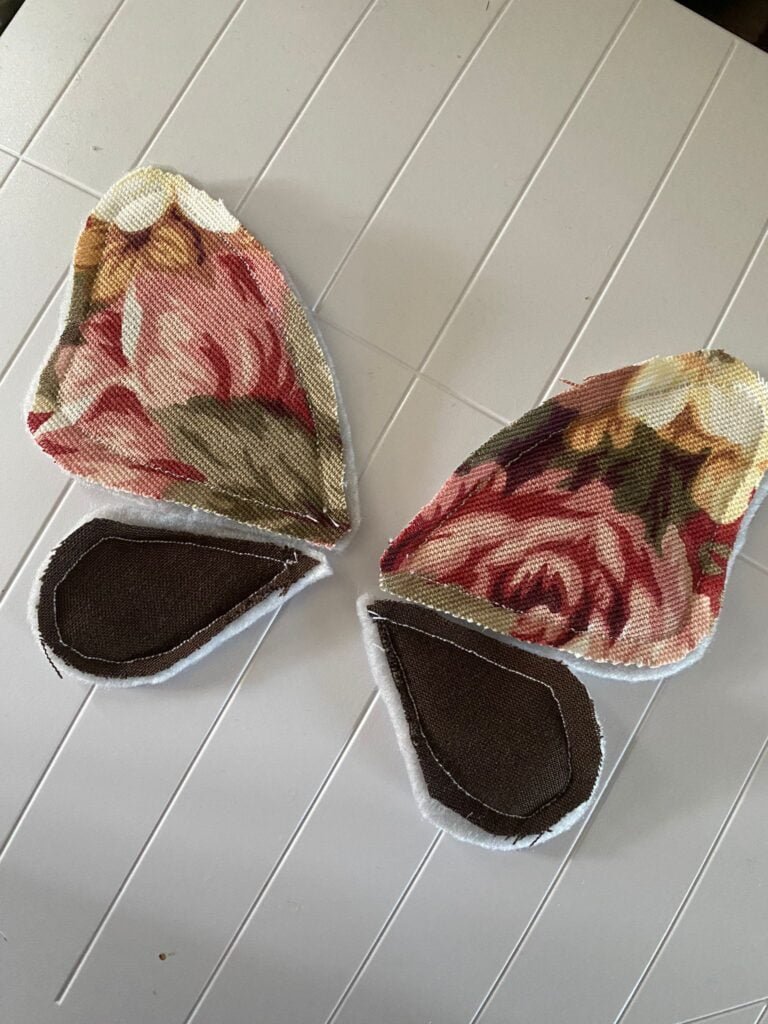
Step 1: Cut the Pattern Pieces
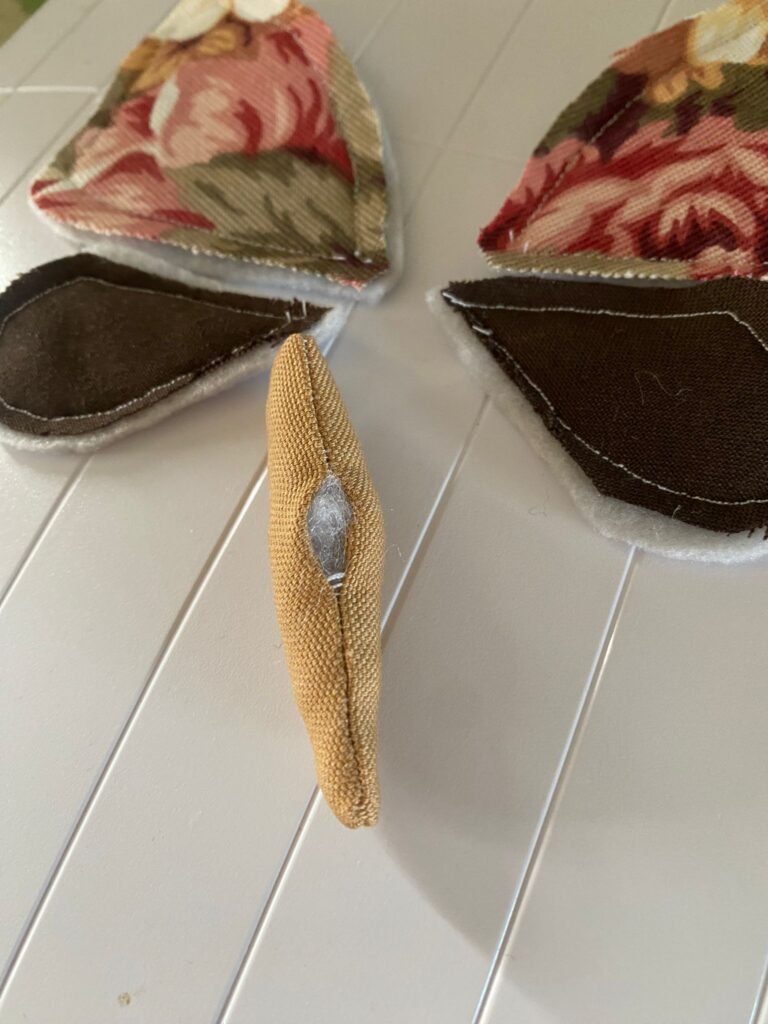
- 1 x Body Piece
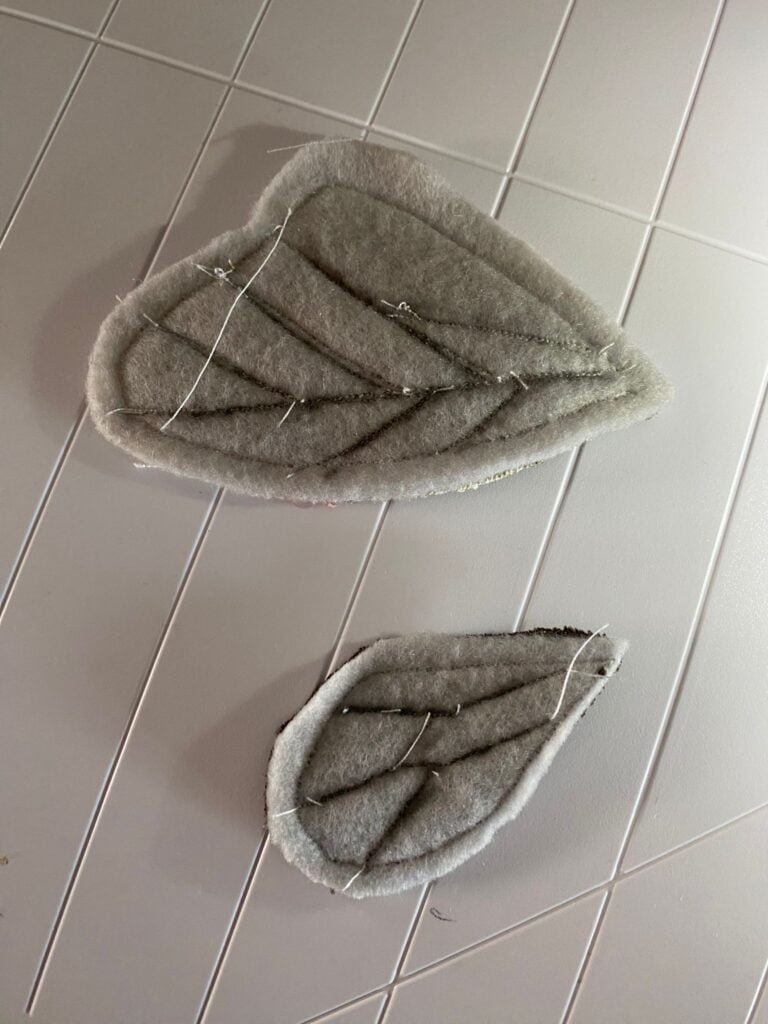
- 2 x large wings on felt
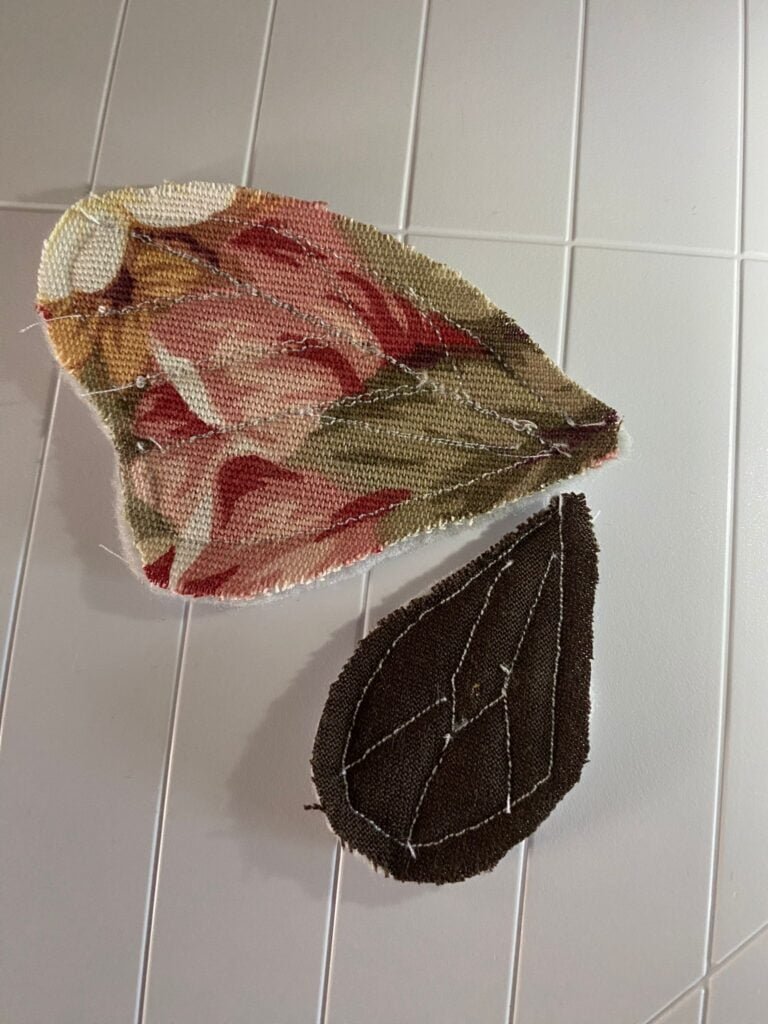
- 2 x large wings on fabric
- 2 x small wings on felt
- 2 x small wings on fabric
Step 2: Let Make the Butterfly Wings
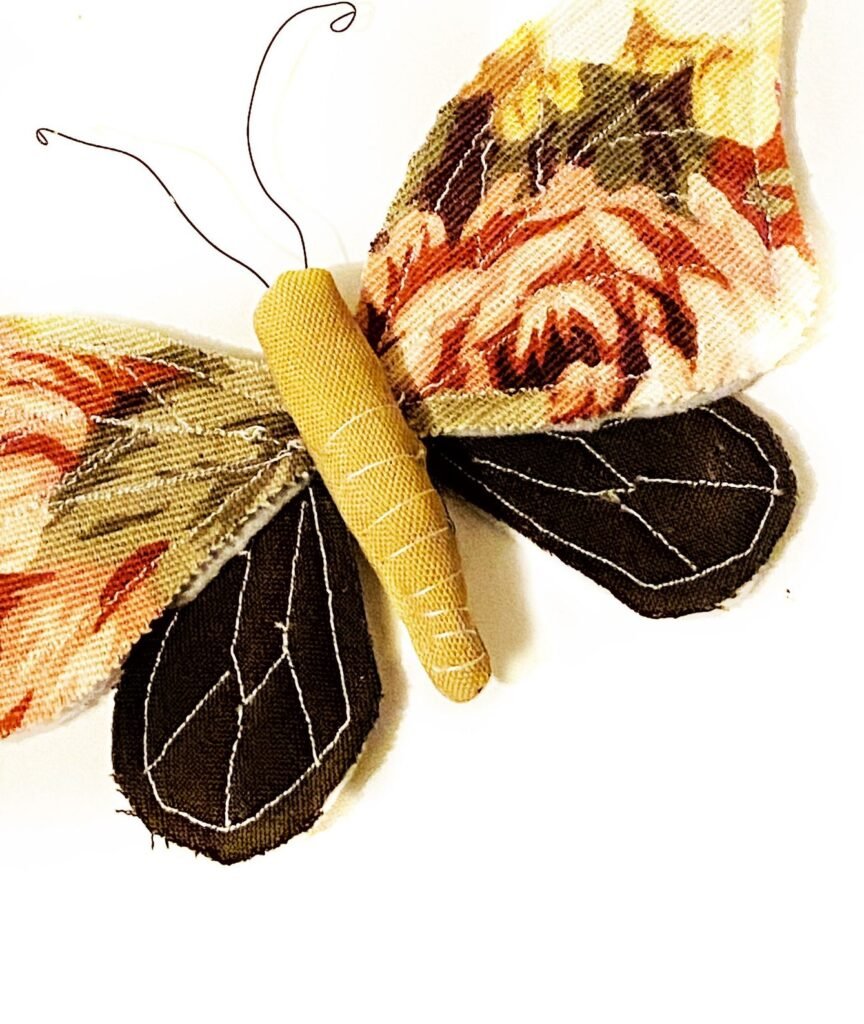
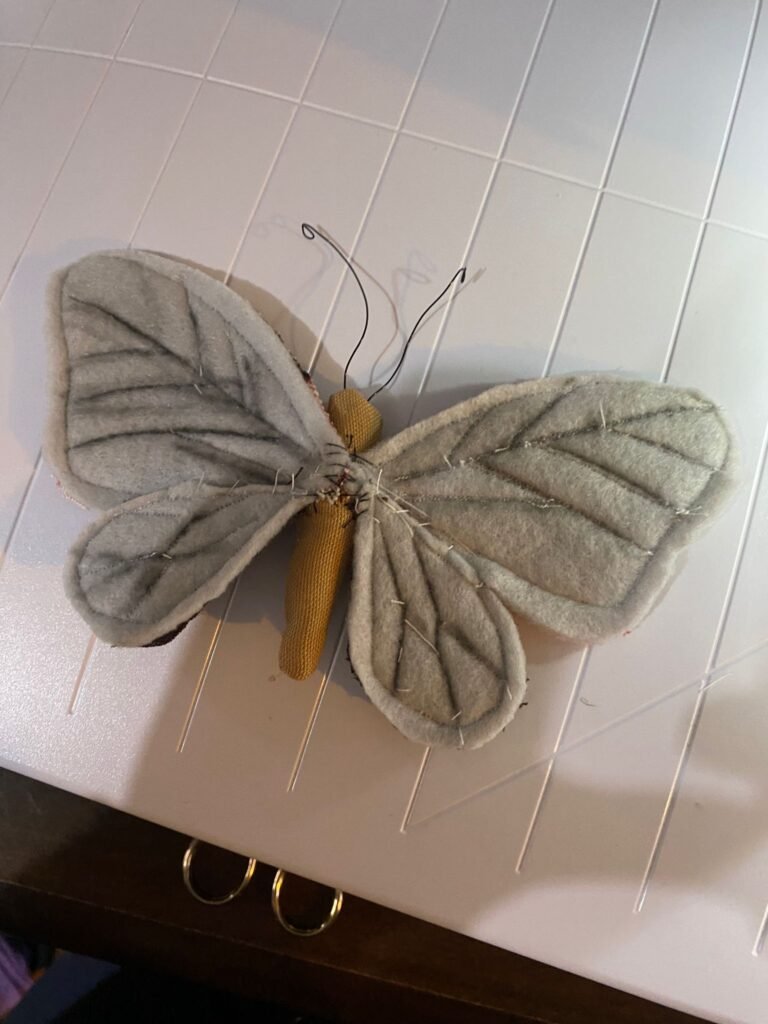
For the wings, right side out, sew right around the edge of the four separate wings. Each wing should have one fabric piece and one felt piece. After the wings are stitched, sew a design on the wings. Firstly I drew with pencil on the felt on the back of the wing design. Once I was happy I traced the design with my machine.

Step 3: Making the Butterfly Body
For the body, stitch the body fabric’s right sides together all around but leave a gap enough to pull the fabric right away out. Stuff the body with the stuffing fluff and hand stitch close.
Then add stitch lines horizontally in the lower half of the butterfly body. See the pictures below. Add as many or as little as you desire.

Step 4: Using the Craft Wire
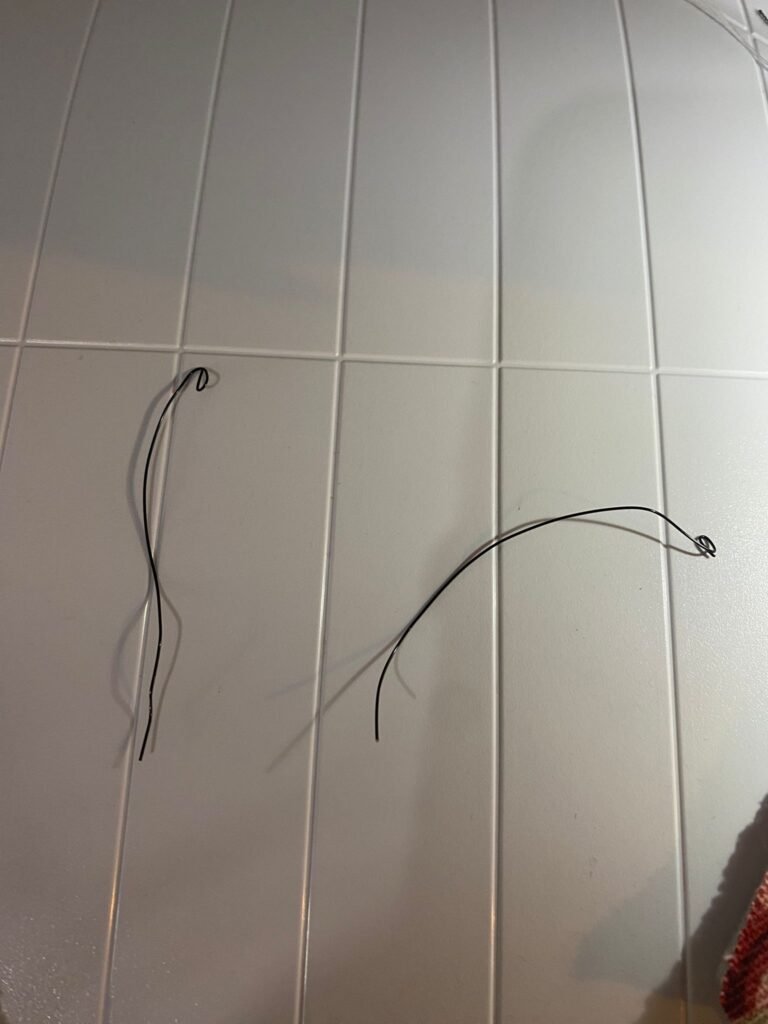
To make the butterfly antenna, get two pieces of the black craft wire, make it the length you desire, and curl the ends in. Add some curves to the entire length of the wire antenna to make it look more organic and natural.
Step 5: Adding it all Together
The last step is to add it all together. For my fabric butterfly, I wanted the smaller wings to be slightly under the larger wings, so I carefully hand-stitched the smaller wings under the larger ones. Make sure to carefully hand-stitch it, so the stitches can be seen on the front side of the butterfly. If you don’t want to hand stitch, fabric glue could work too.
I then attached the wings to the body. Decide the placement and simply hand stitch them to the body.
Lastly, I put the antenna into the body. The wire should be sharp enough to pierce the fabric and slide in.
I then added a safety pin to the back to so I could wear it as a brooch.


The Finished Fabric Butterfly